There’s something truly comforting about the classic flavors in Grandma’s Thanksgiving Turkey Stuffing Recipe. Every bite takes me back to those cozy holiday kitchens, with its buttery, savory aroma filling the air, and I promise you, it’s worth making this stuffing your new tradition.

Jump to:
- Why You'll Love This Recipe
- Ingredients & Why They Work
- Make It Your Way
- Step-by-Step: How I Make Grandma’s Thanksgiving Turkey Stuffing Recipe
- Top Tip
- How to Serve Grandma’s Thanksgiving Turkey Stuffing Recipe
- Make Ahead and Storage
- Frequently Asked Questions:
- Final Thoughts
- Grandma’s Thanksgiving Turkey Stuffing Recipe
Why You'll Love This Recipe
I’ve been making this stuffing for years, and what keeps me coming back is how incredibly versatile and foolproof it is. It’s the perfect balance of buttery crisp edges, tender bread soaked with savory stock, and that touch of warmth from the poultry seasoning. It’s exactly what you want on Thanksgiving, or any time you need a little comfort food hug.
- Rich Butter Flavor: This recipe calls for plenty of butter to give you that melt-in-your-mouth richness you can’t ignore.
- Perfect Bread Texture: Using heavier bread like French bread means the stuffing soaks up juices beautifully without turning mushy.
- Simple Ingredients, Big Impact: You probably have everything on hand, and the combination just works magically every time.
- Great Make-Ahead Option: Whether you prep your bread cubes early or assemble ahead, this stuffing is super convenient around the busy holidays.
Ingredients & Why They Work
Each ingredient in Grandma’s Thanksgiving Turkey Stuffing Recipe plays an important role in delivering that classic, cozy flavor. The key to success here is starting with the right bread and layering in sautéed aromatics that bring the whole dish alive.
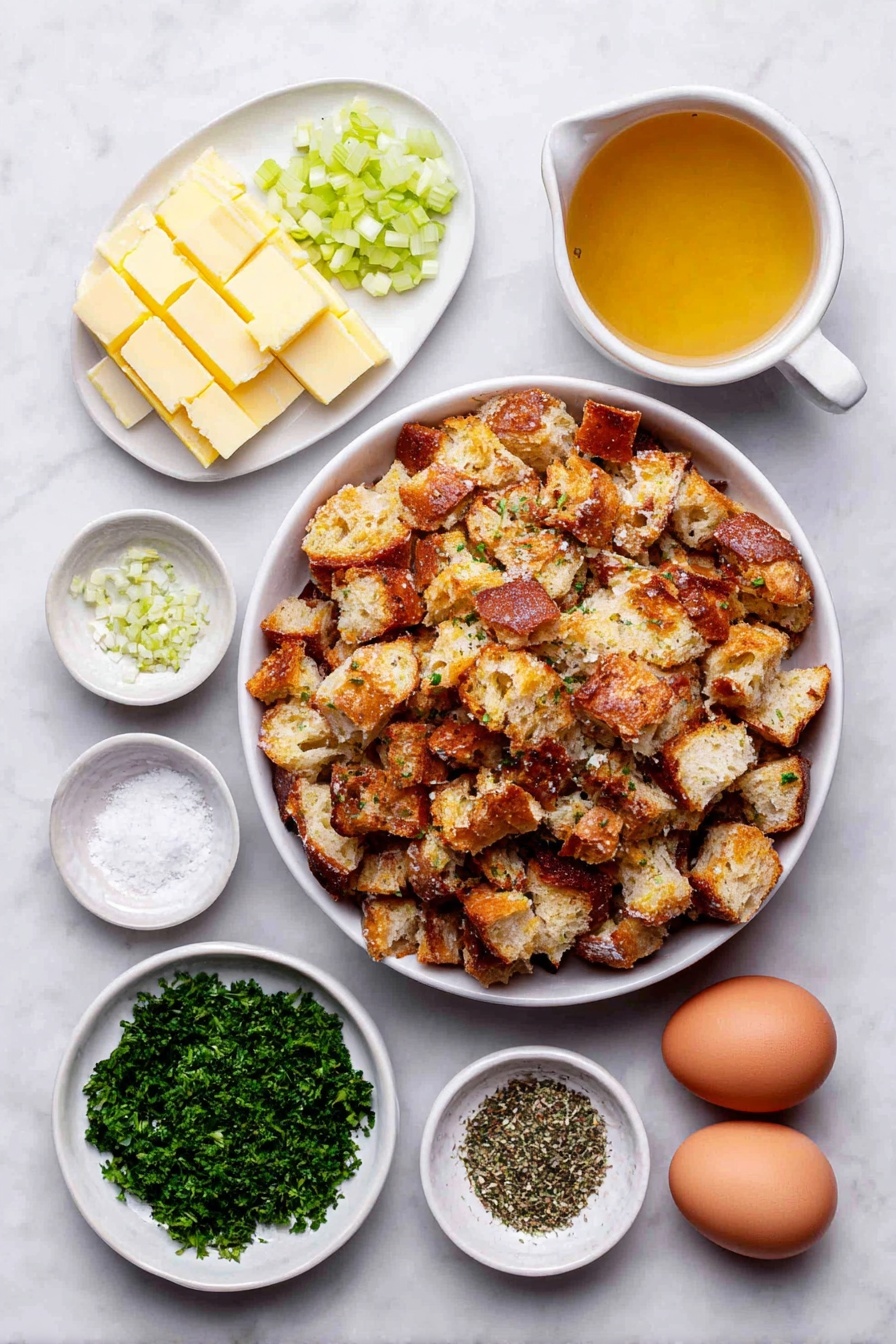
- Dry Bread Cubes:I prefer using French bread for its sturdy crumb that absorbs the stock without becoming soggy — homemade dried cubes work best if you have the time.
- Unsalted Butter:Generous butter adds deep flavor and helps soften the veggies while giving the stuffing a luscious texture.
- Chopped Celery:This brings a subtle crunch and freshness that balances the richness.
- Diced Yellow Onion:The slight sweetness of cooked onions is essential to flavor depth.
- Salt & Black Pepper:Basic but crucial seasonings to enhance all the components.
- Poultry Seasoning:This is the secret herb blend that gives that holiday, timeless turkey-sidekick vibe.
- Chicken Stock:Low sodium is my choice here so you control the saltiness; this liquid soaks into the bread and ties it all together.
- Large Eggs:They bind everything so your stuffing holds its shape and isn’t crumbly when served.
Make It Your Way
I love keeping this recipe classic, but sometimes I tweak it to suit who I'm cooking for—more herbs, less butter, or adding a secret ingredient or two. Feel free to make it yours!
- Variation: Adding chopped mushrooms or cranberry bits gives it a fresh twist—I’ve seen how the tartness pairs wonderfully with the buttery bread cubes.
Step-by-Step: How I Make Grandma’s Thanksgiving Turkey Stuffing Recipe
Step 1: Prep and Sauté the Aromatics
Start by heating the butter in a large skillet over medium-high heat. Toss in your diced onion and chopped celery, and sauté until they’re soft and fragrant—usually about 10-12 minutes. I always watch closely here; the key is to get tender veggies without browning them too much since that can overpower the delicate flavor of the stuffing.
Step 2: Mix the Base
Place your dry bread cubes in a big bowl. Pour that luscious butter, celery, and onion mixture right over the cubes, then gently toss until everything’s combined and the bread starts to get that golden gloss.
Step 3: Season and Bind
Add salt, pepper, and your poultry seasoning, then pour in the chicken stock. Crack in the eggs last and stir everything carefully until you’ve got a beautifully moistened mixture that’s ready for its baking debut.
Step 4: Bake to Perfection
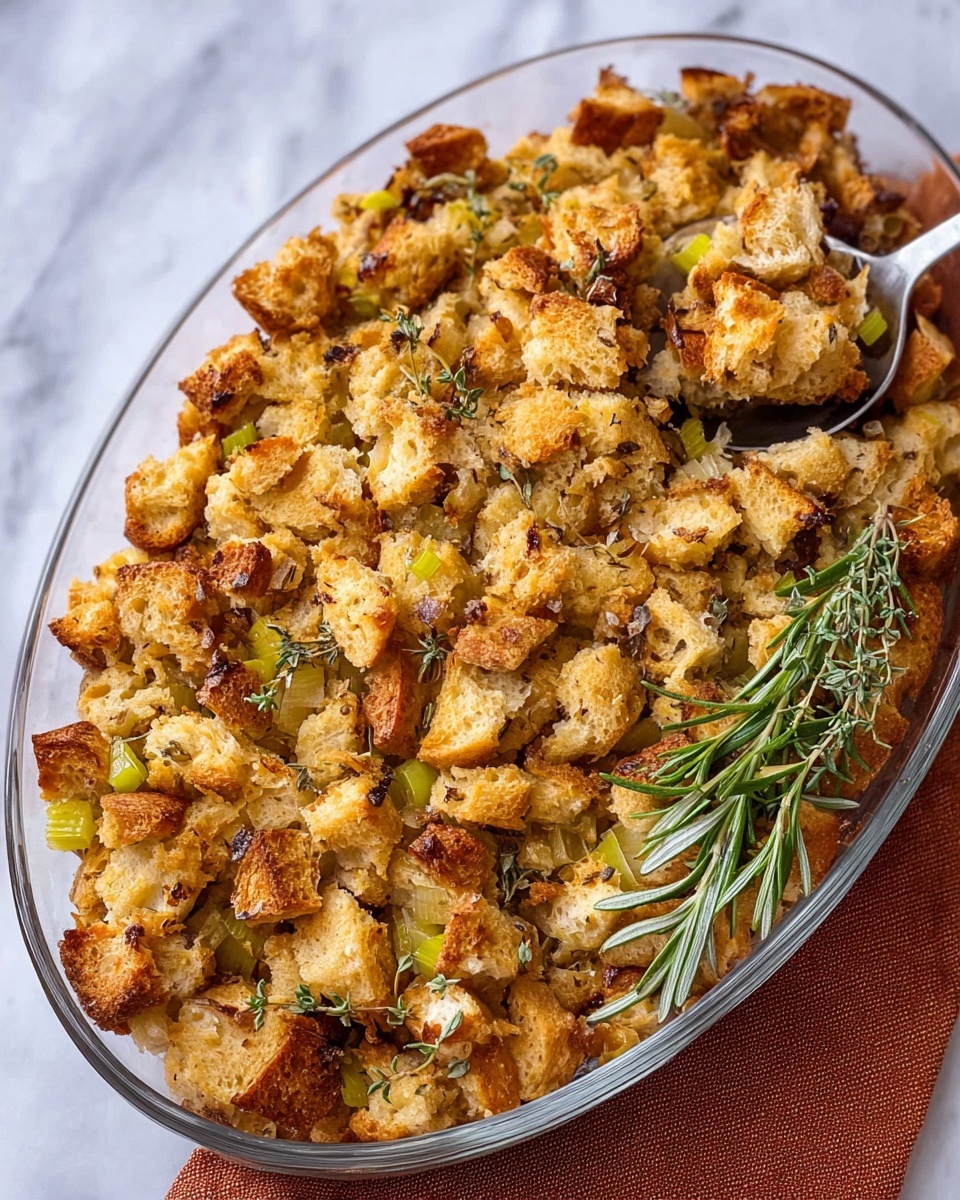
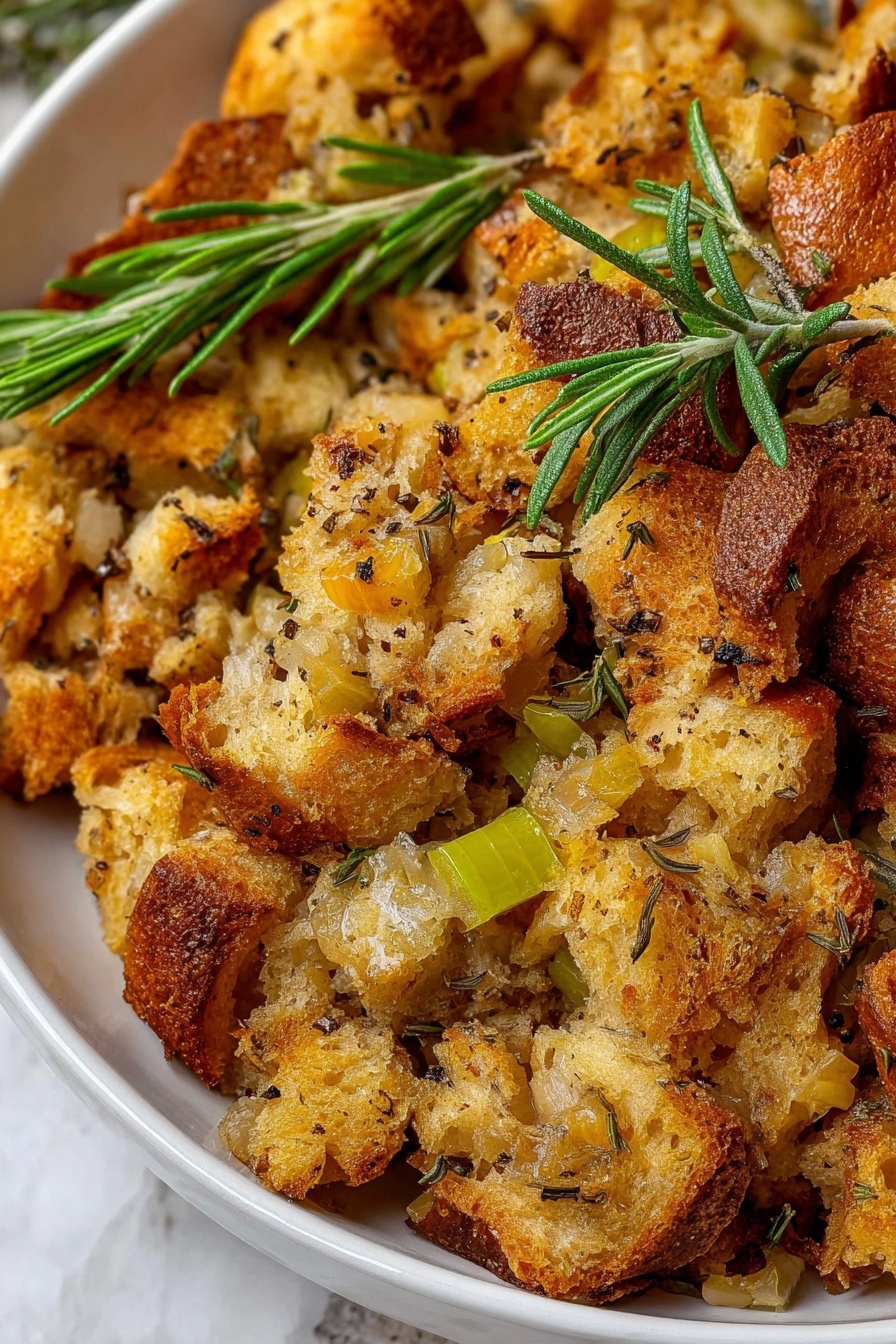
Transfer the stuffing into a cooking spray–prepared casserole dish and spread it evenly. Pop it into your preheated 350ºF oven and bake for around 30-35 minutes. You’re aiming for a golden top with crispy edges but still moist inside. Every Thanksgiving, the smell from the oven is like a warm hug waiting at the table.
Top Tip
Over the years, I've learned a few tricks that really make Grandma’s Thanksgiving Turkey Stuffing Recipe shine and help avoid common pitfalls.
- Dry Your Bread Right: I always dry out my bread cubes for at least 48 hours, stirring occasionally so the cubes dry evenly without molding. This makes a huge difference in how the bread absorbs the liquids without turning mushy.
- Butter Counts: Don’t skimp on butter—it’s the foundation for the rich flavor and moist texture.
- Don’t Overmix: When adding stock and eggs, fold gently to keep the bread cubes intact; this prevents a soggy or overly dense stuffing.
- Watch Your Bake Time: Pull it out just as the top turns golden—leave it too long and the edges can dry out.
How to Serve Grandma’s Thanksgiving Turkey Stuffing Recipe
Garnishes
I’m a sucker for fresh parsley chopped and sprinkled on top just before serving—it adds a lovely pop of color and fresh herb aroma. Rosemary sprigs or even a little sage can bring that festive flair right to your plate.
Side Dishes
I always pair this stuffing with roasted turkey, cranberry sauce, green beans almondine, and buttery mashed potatoes. The flavors complement each other beautifully, making each bite sing.
Creative Ways to Present
For special occasions, I’ve baked the stuffing inside hollowed-out squash or even stuffed it into turkey legs—it makes for such a unique presentation that guests love, plus it keeps the stuffing extra moist and flavorful.
Make Ahead and Storage
Storing Leftovers
Leftovers are gold in my house! I store them in airtight containers in the fridge for up to 4 days. Just make sure to cool the stuffing fully before sealing to keep it fresh and tasty.
Freezing
Freezing works like a charm. I recommend dividing the stuffing into portions, freezing in sealed containers or freezer bags, and thawing overnight in the fridge before reheating. This way, you always have a comforting side on hand.
Reheating
For leftovers, I reheat covered in the oven at 350ºF until warmed through—usually about 15-20 minutes. Covering keeps it moist, and then I uncover in the final minutes for that crispy top again.
Frequently Asked Questions:
Absolutely! Store-bought bread cubes can be used, but keep in mind they tend to be drier and crispier, so you might want to adjust the amount of chicken stock to make sure the stuffing stays moist enough.
Cooking stuffing separately, like in this recipe, gives you more control over its texture and ensures even cooking. It also reduces any food safety concerns, and you get that perfect golden crust on top every time.
Yes! You can prepare the stuffing mixture up to a day in advance, then cover and refrigerate it. When you’re ready, bake as directed. This saves you time on the holiday and helps flavors meld beautifully.
The key lies in the bread you use and the amount of stock added. Using heavier bread that can soak up liquid without falling apart is important. Also, adding stock gradually and mixing gently helps balance moisture perfectly. If the mixture feels dry, add a splash more stock; if too soggy, add a handful more bread cubes.
Final Thoughts
This Grandma’s Thanksgiving Turkey Stuffing Recipe is more than just a side dish; it’s a memory maker, a tradition, and a flavor-packed crowd-pleaser. Whether it’s your first time or your hundredth, I hope this recipe helps you create moments around your table as warm and inviting as the stuffing itself. Give it a try—you’ll be so glad you did.
Print
Grandma’s Thanksgiving Turkey Stuffing Recipe
- Prep Time: 20 minutes
- Cook Time: 35 minutes
- Total Time: 55 minutes
- Yield: 10 servings
- Category: Side Dish
- Method: Baking
- Cuisine: American
- Diet: Low Lactose
Description
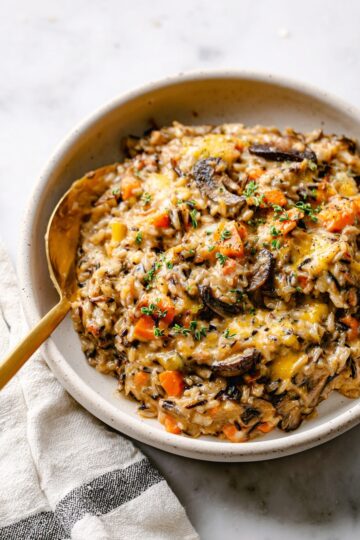
Grandma’s Thanksgiving Turkey Stuffing is a classic, comforting side dish featuring perfectly sautéed celery and onions mixed with savory bread cubes, seasoned with poultry seasoning, and baked to golden perfection. This recipe uses a hearty French bread for optimal moisture absorption, delivering a moist and flavorful stuffing that's perfect for holiday dinners.
Ingredients
Main Ingredients
- 13-15 cups dry bread cubes (about 2 1 pound loaves, preferably French bread)
- 1 ½ cups unsalted butter
- 1 cup chopped celery
- 1 cup diced yellow onion
- 2 ¼ teaspoons salt
- 1 teaspoon ground black pepper
- 1 ½ tablespoons poultry seasoning
- 1 ½ cups chicken stock (low sodium recommended)
- 2 large eggs
Instructions
- Preheat Oven: Preheat the oven to 350ºF and spray a 2 quart casserole dish or 9×13 inch baking dish with cooking spray to prevent sticking.
- Sauté Vegetables: In a large skillet, melt the butter over medium-high heat, then add the chopped celery and diced yellow onion. Sauté for 10-12 minutes until the vegetables are tender and fragrant.
- Combine Ingredients: Place the dry bread cubes in a large mixing bowl. Pour the sautéed butter, onion, and celery mixture over the bread cubes and toss to combine evenly.
- Add Seasonings and Liquids: Add salt, ground black pepper, poultry seasoning, chicken stock, and eggs to the bread mixture. Stir well to combine all ingredients thoroughly.
- Bake the Stuffing: Spread the stuffing mixture evenly into the prepared baking dish. Bake in the preheated oven for 30-35 minutes, or until the top is golden brown and the stuffing is heated through.
- Garnish and Serve: Optionally, garnish the baked stuffing with fresh parsley or herbs like rosemary before serving warm.
Notes
- Make your own dried bread cubes by cutting bread into 1 inch cubes and drying in a large bowl for 48 hours, stirring occasionally for even drying.
- Press bread cubes firmly into the measuring cup to ensure correct quantity as loosely packed cubes will affect the texture and moisture absorption.
- If using store-bought crispy bread cubes, increase the amount of bread cubes as they are drier than homemade cubes.
- Store leftovers in an airtight container in the refrigerator for up to 4 days and reheat before serving.
- Using low sodium chicken stock helps control saltiness in the dish.
- The nutritional info is an estimate; for precise data, consider using a nutrition calculator with your specific ingredient brands.
Nutrition
- Serving Size: 1/10 recipe
- Calories: 250 kcal
- Sugar: 3 g
- Sodium: 450 mg
- Fat: 12 g
- Saturated Fat: 7 g
- Unsaturated Fat: 4 g
- Trans Fat: 0 g
- Carbohydrates: 30 g
- Fiber: 2 g
- Protein: 6 g
- Cholesterol: 55 mg


Leave a Reply