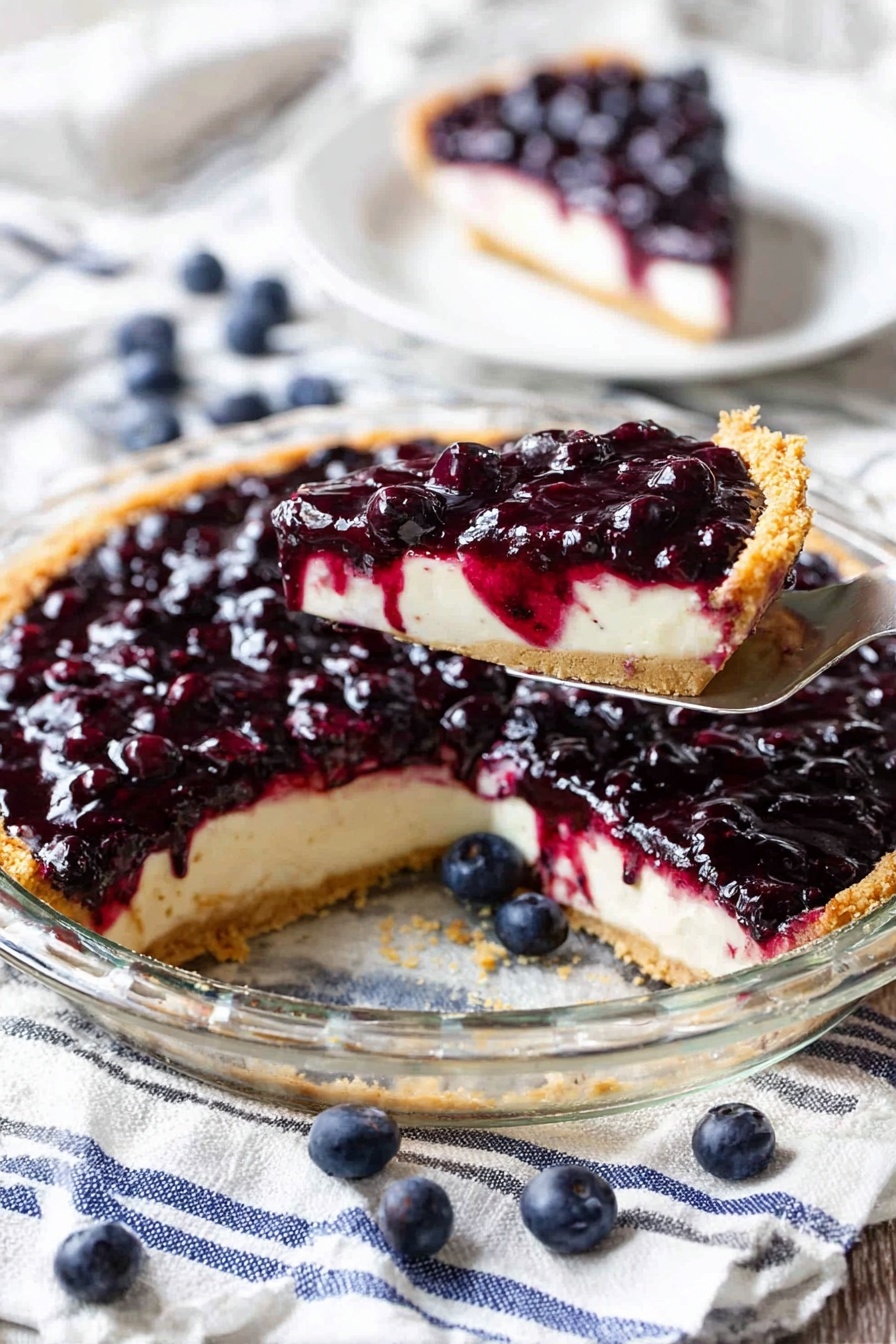
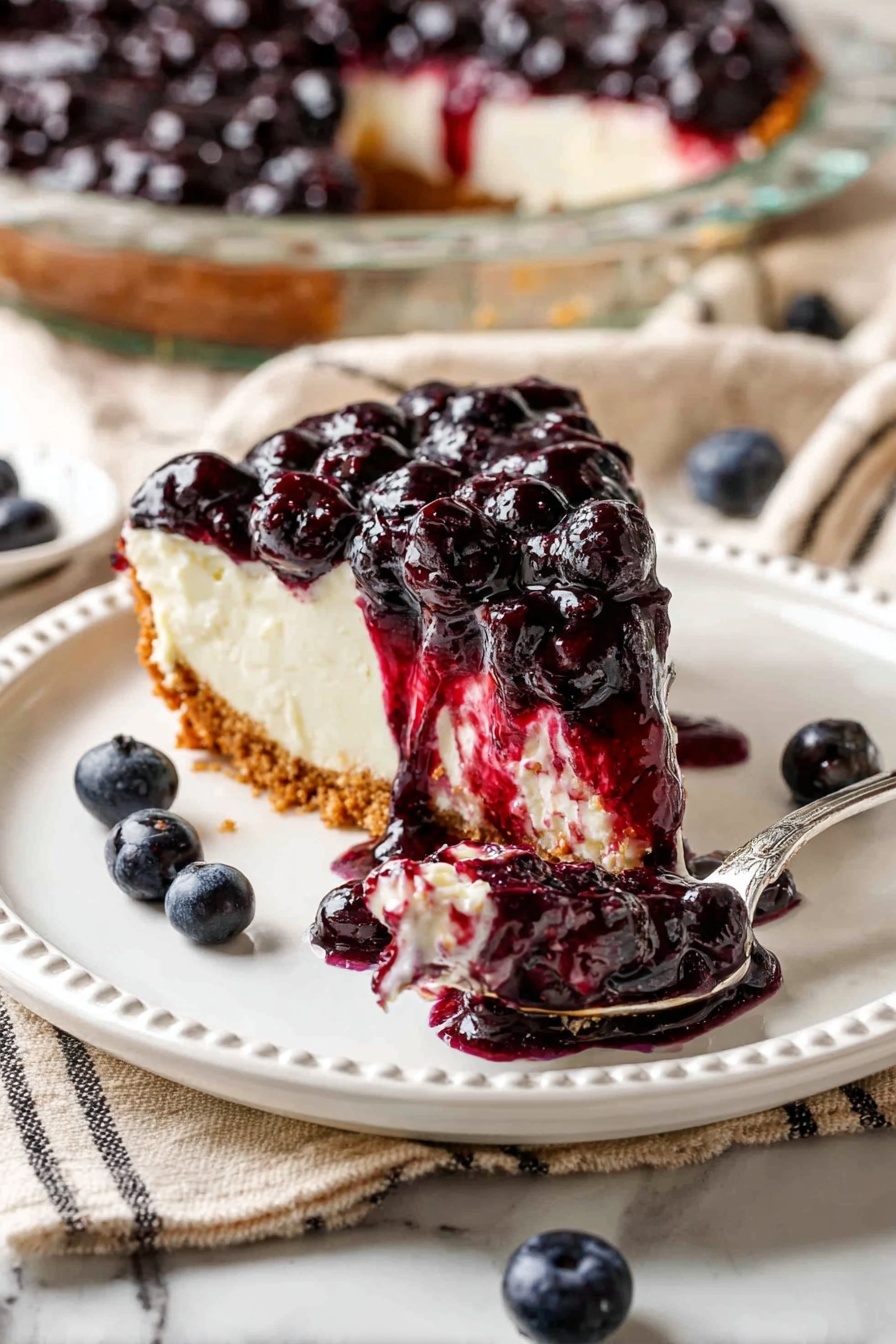
There’s something truly magical about the creamy texture paired with tangy sweetness in a homemade Blueberry Cheesecake Recipe. This isn’t just any cheesecake—it’s one of those desserts that feels like a little celebration every time you slice a piece. Trust me, once you try it, you’ll understand why it’s worth every minute of prep.

Jump to:
Why You'll Love This Recipe
I’m genuinely excited to share this Blueberry Cheesecake Recipe because it’s a fantastic blend of a classic creamy cheesecake with a fresh blueberry twist. I’ve made many cheesecakes before, but this one wins my heart with its velvety texture and that dreamy blueberry sauce on top.
- Perfect Crust: The vanilla wafer crust adds a lovely buttery crunch that balances the creamy filling perfectly.
- Silky Texture: Using room temperature ingredients and just the right baking method gives you a smooth, crack-free cheesecake every time.
- Fresh Blueberry Sauce: This sauce is easy to make and adds a vibrant, tangy pop of flavor that complements the richness wonderfully.
- Impressively Simple: It looks like a bakery-worthy dessert, but you can make it confidently in your own kitchen.
Ingredients & Why They Work
Every ingredient in this Blueberry Cheesecake Recipe plays a cozy role in creating that classic, creamy flavor you want—paired with just enough tang and sweetness. Here’s the lowdown on what you’ll need and why it’s there:
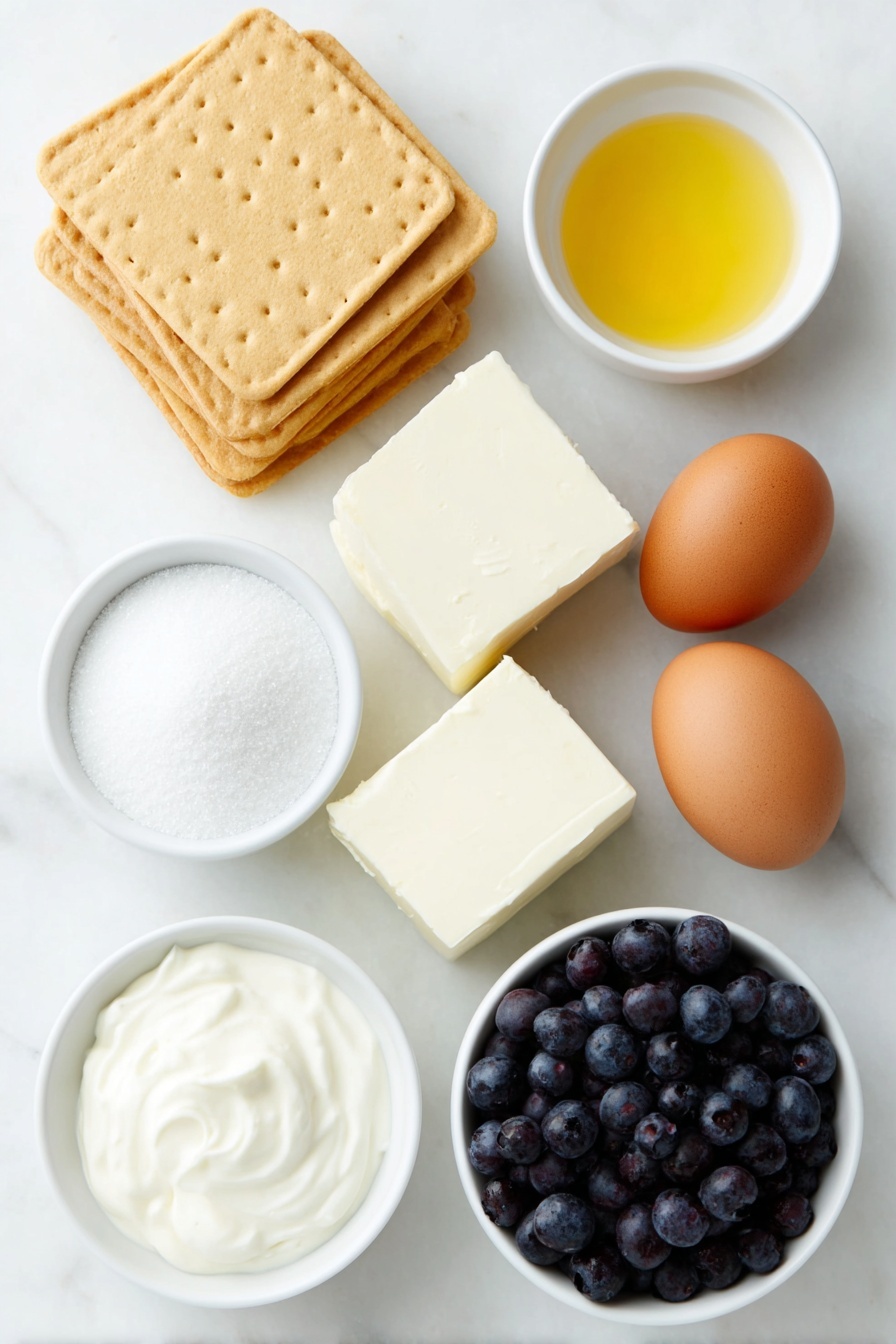
- Vanilla wafers: These form the base crust with a rich vanilla flavor and a pleasant crunch that holds everything together nicely.
- Sugar: Sweetness for both the crust and filling, providing balance without being overpowering.
- Butter: Melted and mixed with the wafers, it adds moisture and richness to the crust.
- Cream cheese: The star of the filling—make sure it’s softened to achieve that smooth, velvety texture.
- Eggs and egg yolk: These bind the filling, giving it structure while keeping it creamy.
- Sour cream: Adds tanginess and moistness, keeping the cheesecake from being too dense.
- Vanilla extract: A subtle depth of flavor that enhances all the other ingredients.
- Blueberry sauce: The fresh topping to bring a bright fruity contrast—homemade is best, and I’ll show you how!
Make It Your Way
I love how forgiving this Blueberry Cheesecake Recipe is when it comes to making it your own. Whether you want to play with flavors or adapt it for special diets, you can easily switch things up without losing the magic.
- Variation: For a lighter twist, I sometimes swap sour cream for Greek yogurt—it maintains creaminess but adds a slight tang that I adore.
- Fruit swaps: Instead of blueberry sauce, try raspberry or strawberry for a fresh seasonal touch.
- Dietary tweak: If you want to go gluten-free, substitute the vanilla wafer crust for gluten-free cookies or nut-based crusts.
Step-by-Step: How I Make Blueberry Cheesecake Recipe
Step 1: Perfect the Crust
First, I pulse the vanilla wafers until they’re finely ground—using a food processor works like a charm for this, but if you don’t have one, you can place the wafers in a zip-top bag and crush them with a rolling pin. Mix in sugar and melted butter until uniform, then press the mixture evenly into your pie pan, making sure it comes slightly up the sides. Bake at 350°F for about 8-10 minutes—just enough for a light golden color. Let it cool completely before moving on to the filling.
Step 2: Whip Up the Creamy Filling
Preheat your oven to 325°F. Beat the softened cream cheese until it’s incredibly smooth—don’t rush this part; it takes about 3-5 minutes to get that creamy base without lumps. Add sugar and keep beating before slowly mixing in the eggs and yolk one at a time, just until combined. Stir in sour cream and vanilla extract gently, making sure not to overmix, which could trap too much air and cause cracks later. Pour this luscious filling over your cooled crust.
Step 3: Bake in a Water Bath for Smoothness
Here’s my trusted secret: I place the pie pan inside a larger roasting pan and pour warm water halfway up the sides. This water bath helps the cheesecake bake evenly, preventing cracks and dry edges. Bake for 45 minutes at 325°F. You’re looking for the edges to be mostly set, but the center should still jiggle slightly—that soft wobble means it will firm up beautifully in the fridge.
Step 4: Cooling Like a Pro
Turn off the oven and crack the door open, leaving the cheesecake inside for 30 minutes to cool gently. After that, move it to a wire rack to cool completely before chilling it in the refrigerator for at least 4 hours—overnight is ideal. During this chill time, the cheesecake firms up and the flavors meld together beautifully.
Step 5: Make Your Blueberry Sauce
While the cheesecake bakes, whip up a fresh blueberry sauce. Simmer fresh or frozen blueberries with a little sugar and lemon juice until thickened. Let it cool in the fridge separately. The sauce thickens as it chills, becoming that perfect spoonable tart topping that you’ll want to smother on every slice.
Top Tip
After making this Blueberry Cheesecake Recipe a dozen times (and yes, tasting often along the way!), I’ve learned a few insider tricks that keep this dessert flawless every time—and I want to share them with you.
- Room Temperature is Key: I can’t stress this enough—softened cream cheese, eggs, and sour cream mix smoother and bake evenly, preventing lumps and cracks.
- Don’t Overmix Eggs: Adding eggs one at a time and just mixing until combined keeps the batter from becoming too airy, which helps prevent cracking.
- Water Bath Wonder: Using the water bath method creates gentle, even heat around the cheesecake, stopping the edges from cooking too fast and cracking.
- Slow Cooling Saves Cheesecake: Cooling with the oven door cracked, then outside, then fridge helps the cheesecake relax gently—rushing can lead to shrinkage and cracks.
How to Serve Blueberry Cheesecake Recipe
Garnishes
I’m a big fan of letting the blueberry sauce take center stage without too many distractions. However, when I want to jazz it up a bit, a few fresh blueberries on top and a sprig of mint add such a pretty touch. Sometimes I even dust a tiny bit of powdered sugar—it looks like a delicate snow-kissed cheesecake, which everyone enjoys.
Side Dishes
To balance the richness, I often serve this cheesecake with a light green salad tossed in a citrus vinaigrette or a refreshing glass of iced herbal tea. If it’s a special occasion, a scoop of vanilla bean ice cream on the side never hurts—extra creaminess for those who want it!
Creative Ways to Present
For birthdays or get-togethers, I’ve layered slices of cooled cheesecake in clear dessert glasses with alternating layers of blueberry sauce and crushed vanilla wafer crumbs—like a fancy parfait. It’s a fun twist that gets noticed and tastes delightful.
Make Ahead and Storage
Storing Leftovers
I store leftover cheesecake covered tightly with plastic wrap or in an airtight container in the fridge. It stays fresh and creamy for up to 4 days. Just be sure the blueberry sauce is stored separately until serving so the crust doesn’t get soggy.
Freezing
Freezing cheesecake can be a bit tricky, but this Blueberry Cheesecake freezes well if wrapped tightly in plastic wrap and then foil. When I’ve done this, I thaw it overnight in the fridge, and it keeps its texture remarkably well. I recommend freezing before adding the blueberry sauce—add fresh sauce after thawing for best flavor.
Reheating
Reheating cheesecake isn’t usually necessary, but if you want a slightly softened slice, I pop it in the microwave on low power for 10-15 seconds. Just be careful not to heat too much, or it can start to melt and lose its beautiful texture.
Frequently Asked Questions:
The key is to use room temperature ingredients, avoid overmixing, bake the cheesecake in a water bath, and cool it gradually. These steps balance the heat and prevent sudden shrinkage that causes cracking.
Absolutely! Frozen blueberries work great and often release more juice, which helps thicken the sauce nicely. Just thaw and simmer them as directed in the recipe.
At least 4 hours is ideal, but overnight chilling is best. This resting time lets the cheesecake set properly and the flavors marry for the most delicious results.
Yes! Swap the vanilla wafers for gluten-free cookies or use a nut-based crust like almond meal mixed with butter. Just press the mixture into the pan like usual and bake.
Final Thoughts
This Blueberry Cheesecake Recipe is one of those desserts I come back to again and again because it feels both special and approachable. It’s like a warm hug on a plate with its creamy filling and bright blueberry topping. I hope you enjoy making it just as much as I do—and remember, practice makes perfect, so don’t worry if your first try isn’t flawless. This cake is as forgiving as it is delicious!
Print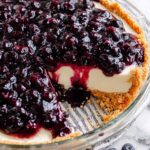
Blueberry Cheesecake Recipe
- Prep Time: 25 minutes
- Cook Time: 45 minutes
- Total Time: 1 hour 10 minutes
- Yield: 12 servings
- Category: Dessert
- Method: Baking
- Cuisine: American
Description
This Fresh Blueberry Cheesecake combines a crunchy vanilla wafer crust with a creamy, smooth cheesecake filling, topped with a homemade blueberry sauce. Perfect for dessert lovers who enjoy a classic, rich cheesecake with a fresh fruit twist.
Ingredients
Vanilla Wafer Crust
- 45 vanilla wafers (heaping 1-½ cups crumbs)
- 2 tablespoons sugar
- 6 tablespoons butter, melted
Cheesecake
- 2 8 oz. blocks cream cheese, softened
- 2 eggs, room temperature
- 1 egg yolk, room temperature
- 1 cup sugar
- 1 cup sour cream, room temperature
- 1 teaspoon vanilla extract
Blueberry Sauce
- 1 recipe Blueberry Sauce (prepared separately)
Instructions
- Prepare crust: Add vanilla wafers to a food processor and pulse until finely ground or crush by hand. Combine crumbs with melted butter and sugar, pulsing until evenly mixed. Press the mixture evenly onto the bottom and up the sides of an ungreased 9-inch pie pan. Bake at 350 degrees F for 10 minutes until edges just start to brown. Let cool completely.
- Make cheesecake filling: Preheat oven to 325°F. Beat softened cream cheese for 3-5 minutes until very smooth and fluffy. Add sugar and beat for 3 more minutes. Add eggs and egg yolk one at a time, beating just until combined after each addition. Mix in sour cream and vanilla extract just until blended. Pour filling over cooled crust.
- Bake cheesecake in water bath: Place pie pan inside a larger roasting pan. Add warm water to the roasting pan halfway up the sides of the pie pan. Bake at 325°F for 45 minutes. The center should still jiggle slightly, and edges should be mostly set.
- Cool cheesecake: After baking, turn the oven off and crack the oven door open. Let cheesecake cool inside for 30 minutes. Remove it and cool completely on a wire rack before chilling in the refrigerator for at least 4 hours, preferably overnight.
- Prepare blueberry sauce: While cheesecake bakes, make the blueberry sauce according to its recipe instructions. Chill sauce separately in the refrigerator.
- Serve: When ready to eat, spoon blueberry sauce over the cheesecake slices and serve.
Notes
- Watch the "how to make" video for detailed guidance.
- Use a water bath to prevent cracks by insulating the cheesecake edges.
- Ensure all ingredients are at room temperature for smooth mixing.
- Beat cream cheese thoroughly until light and fluffy for a silky texture.
- Avoid opening the oven during baking to prevent temperature drops that cause cracks.
- Do not overbake; edges should be firm and center slightly wobbly.
- Allow cheesecake to cool slowly to avoid cracking caused by sudden temperature changes.
- If cracks appear, cover them with blueberry sauce for presentation.
Nutrition
- Serving Size: 1 slice
- Calories: 350 kcal
- Sugar: 28 g
- Sodium: 200 mg
- Fat: 25 g
- Saturated Fat: 15 g
- Unsaturated Fat: 8 g
- Trans Fat: 0.5 g
- Carbohydrates: 25 g
- Fiber: 1 g
- Protein: 6 g
- Cholesterol: 100 mg


Leave a Reply