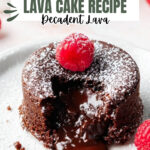
If you’re craving a dessert that’s equal parts elegant and indulgent, you’ve got to try this Chocolate Molten Lava Cakes Recipe. Imagine biting into a rich, dark chocolate cake with a molten, gooey center—that’s pure magic on a plate!

Jump to:
Why You'll Love This Recipe
I still remember the first time I made these lava cakes—watching that molten core ooze out when I cut into them is one of life’s simple, sweet joys. Let me tell you why this version might just become your go-to dessert.
- Super gooey center: The secret is the luscious chocolate ganache that melts perfectly inside every cake.
- Simple to prepare: Despite its fancy look, the recipe uses straightforward ingredients and quick steps.
- Perfectly portioned: Individual ramekins make serving a breeze—no slicing fights here.
- Customizable serving: Dust with powdered sugar, add vanilla ice cream and fresh berries for a dessert that dazzles every time.
Ingredients & Why They Work
When shopping for your ingredients, quality really makes all the difference here. Picking good dark chocolate will elevate your lava cakes from tasty to unforgettable, and fresh eggs at room temperature help the batter come together perfectly.
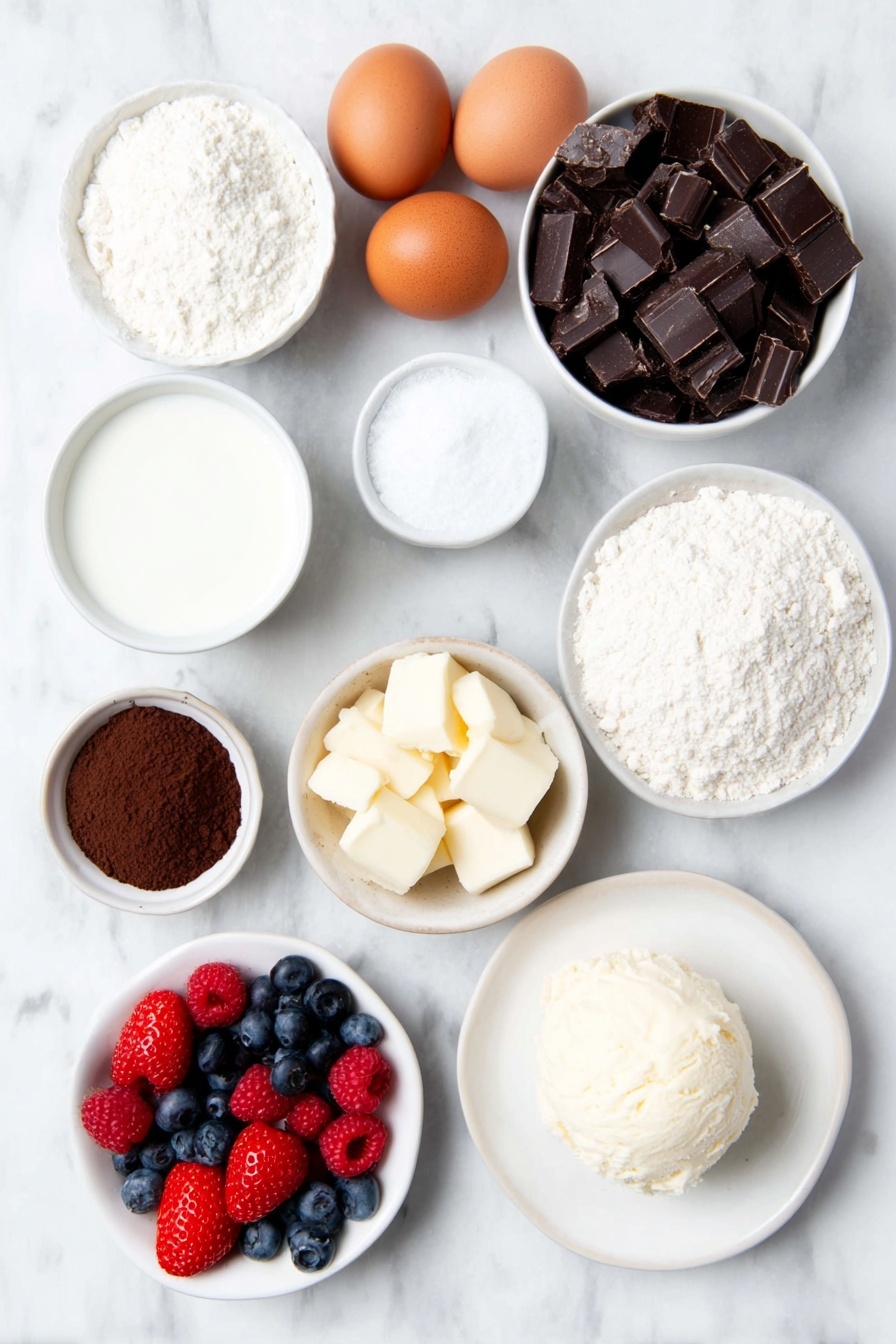
- Dark chocolate: I always recommend finely chopping your chocolate for smooth melting and better texture.
- Heavy cream: This helps create that rich, velvety ganache filling that’s the heart of the lava cake.
- Unsalted butter: Keeps the flavor balanced and lets you control the saltiness.
- Eggs: Using room temperature eggs helps the batter mix evenly and rise beautifully.
- Granulated sugar: Sweetens the cake without overpowering the deep chocolate taste.
- All-purpose flour: Adds just the right structure to hold your cake together but still soft.
- Espresso powder (optional): Boosts the chocolate flavor—don’t worry, it doesn’t make it taste like coffee.
- Kosher salt: Just a pinch to enhance every other flavor.
- Powdered sugar: For a delicate finishing touch that looks gorgeous and adds a hint of sweetness.
- Vanilla ice cream: The perfect cool contrast to the warm molten cake.
- Fresh berries: Brighten up the plate and add a juicy pop.
Make It Your Way
One of the best parts about making this Chocolate Molten Lava Cakes Recipe is how easily you can customize it to suit your taste or the occasion. Whether you're after a richer chocolate flavor, a dairy-free tweak, or a fresh seasonal twist, these cakes are a fantastic canvas for delicious creativity.
- Dairy-Free Variation: Swap out the heavy cream in the ganache for coconut cream and use dairy-free butter for the batter. I tried this version for a friend with dairy sensitivities, and the cakes came out just as luscious and gooey with a subtle tropical note.
- Espresso Boost: Adding that half teaspoon of espresso powder really wakes up the chocolate in these cakes. Whenever I make these for a gathering, I always include the espresso powder—it gives a beautiful depth that’s hard to resist.
- Seasonal Flair: For a festive touch, mix some blood orange zest or a splash of cherry liqueur into the batter. Last winter, I added orange zest and served the cakes with spiced fresh berries, which made the dessert feel cozy and special.
- Easy Ganache Swap: If you’re short on time, replacing the homemade ganache with chilled high-quality chocolate truffles works like a charm. I love this shortcut when unexpected guests drop by and I still want a decadent dessert on the table.
Step-by-Step: How I Make Chocolate Molten Lava Cakes Recipe
Step 1: Crafting the Silky Ganache Center
Start by finely chopping 4 ounces of dark chocolate—this ensures it melts quickly and evenly. Combine it with a quarter cup of heavy cream in a microwave-safe bowl. Heat in 20-second bursts, stirring gently after each interval. Once smooth and glossy, pop the ganache into the fridge to chill for at least an hour until firm enough to roll into little balls. This chilling step is essential so the ganache holds its shape inside the lava cakes.
Step 2: Prep Your Workspace and Ramekins
Preheat your oven to a toasty 400°F. While it warms, give six 6-ounce ramekins a thorough buttering, then dust with flour. Tap out any excess flour so the batter doesn’t stick but also doesn’t get a tough coating. This simple prep ensures your cakes release beautifully after baking.
Step 3: Melt the Chocolate and Butter to Perfection
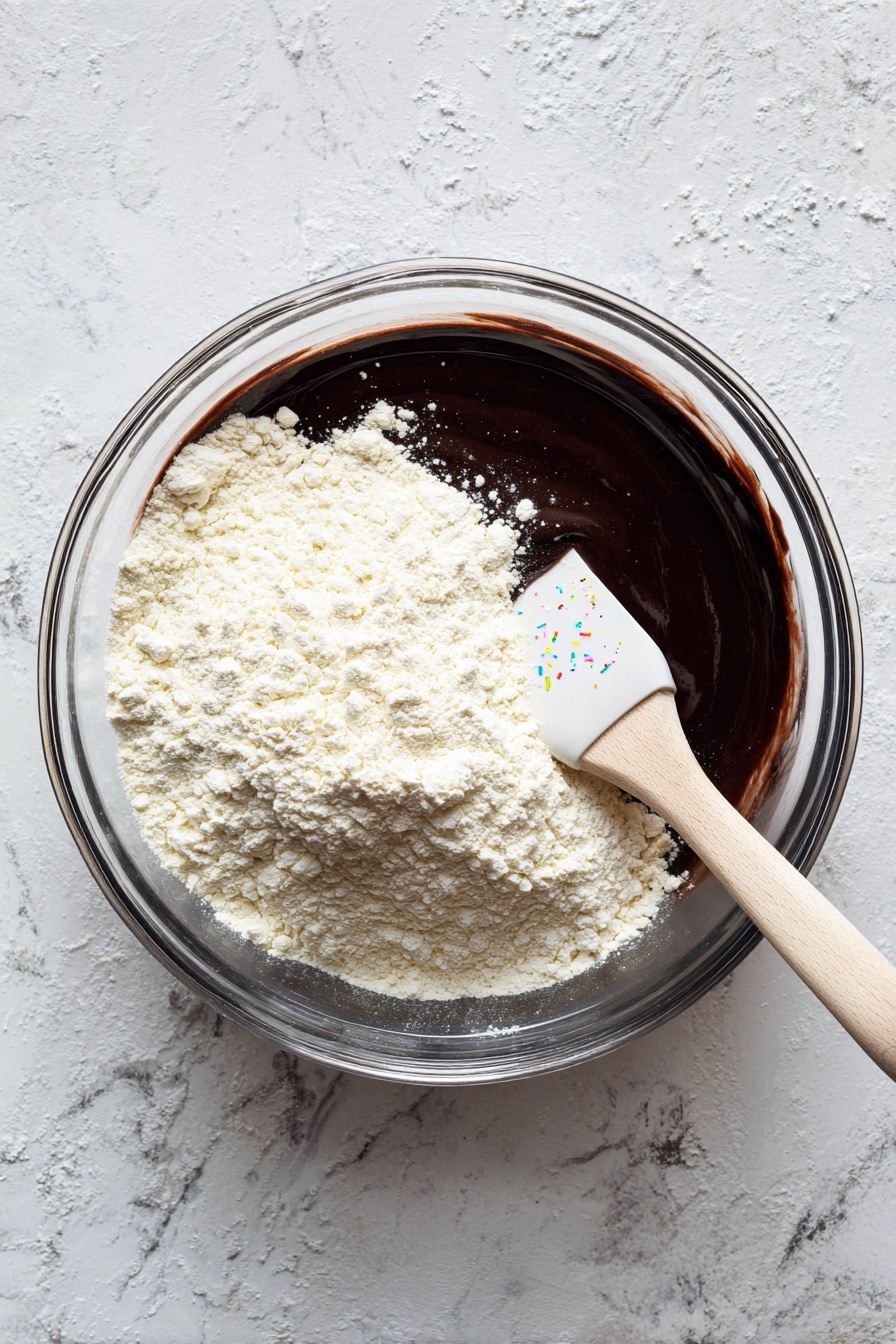
Chop 8 ounces of dark chocolate finely and combine it with half a cup of unsalted butter in a large microwave-safe bowl. Use 30-second intervals to slowly melt the mixture, stirring after each burst. Allow it to cool slightly—this helps avoid scrambling when you add your eggs next. The texture should be smooth and velvety, a gorgeous base for the cake batter.
Step 4: Whisk Eggs and Sugar Until Light and Frothy
In a separate bowl, whisk together 3 large eggs (make sure they’re room temperature for best results) and half a cup of granulated sugar. Whisk until just combined and slightly frothy—this helps give your cakes a lovely lift and tender crumb.
Step 5: Bring it All Together
Slowly pour the egg and sugar mixture into your melted chocolate and butter, whisking gently to combine. Then, fold in a quarter cup of all-purpose flour, half a teaspoon of espresso powder (if you’re using it), and a pinch of kosher salt. Be careful not to overmix here—fold until just combined so your cakes stay tender and soft.
Step 6: Fill the Ramekins and Insert Ganache
Spoon batter into each ramekin until it’s about one-third full. Next, take a tablespoon-sized ball of chilled ganache and nestle it right in the center of the batter. Top each with more batter until the ramekin is about two-thirds full. This layering guarantees the molten center surprise everyone will love.
Step 7: Bake Until Edges Set and Centers are Soft
Place the ramekins in the oven and bake at 400°F for exactly 20 minutes. You’ll know they’re ready when the edges look firm and set, but the centers still feel soft to the touch. This balance is the key to that signature ooey-gooey lava effect.
Step 8: Cool, Unmold, and Serve
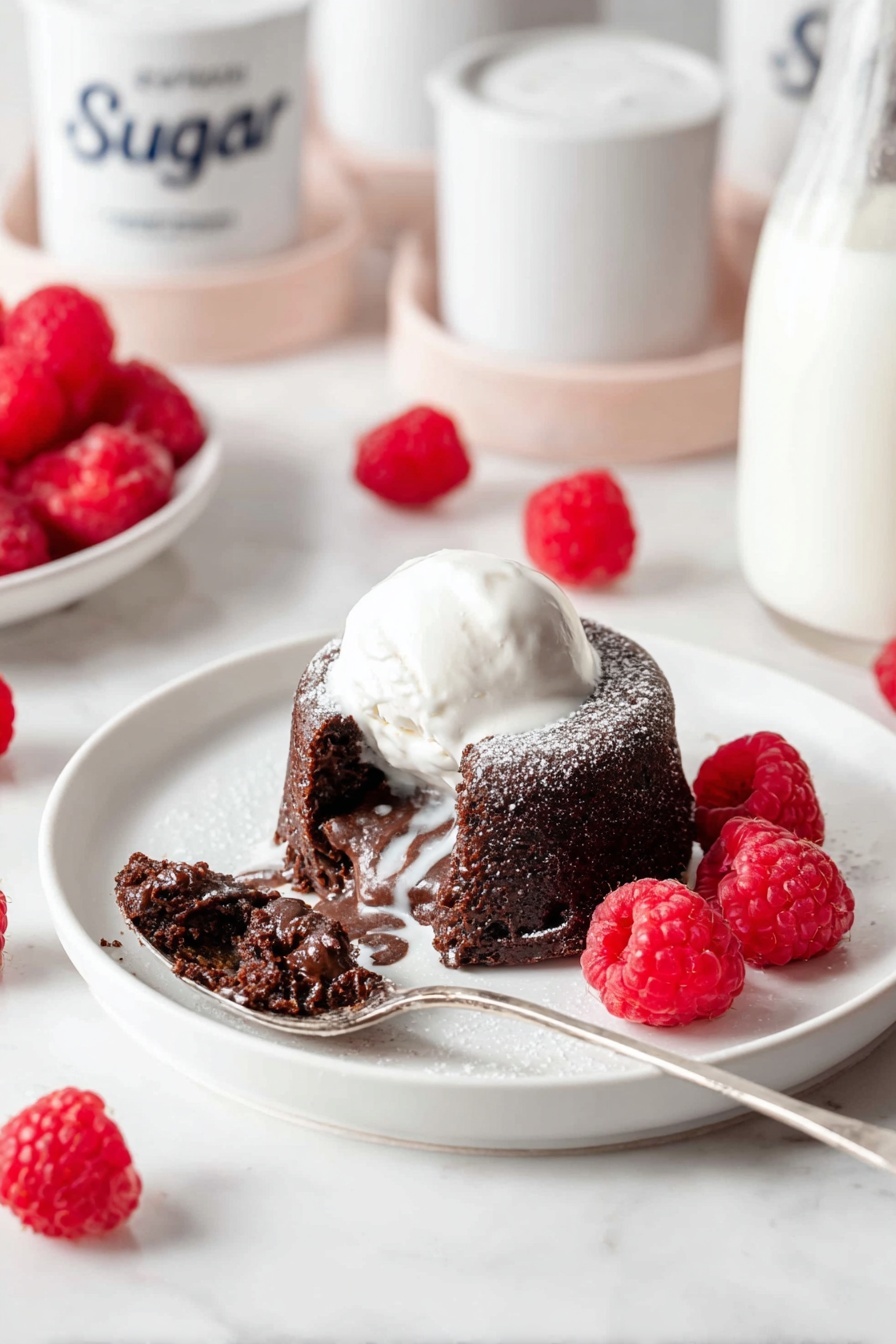
Once baked, let the cakes cool for 2 minutes—just enough so they hold their shape but are still warm inside. To unmold, place a small plate on top of each ramekin, flip, and gently tap the bottom. If you prefer to keep it simple, serve them in the ramekins topped with a light dusting of powdered sugar, a scoop of vanilla ice cream, and fresh berries. Either way, you’re in for a decadent treat!
Top Tip
Mastering the perfect Chocolate Molten Lava Cakes Recipe is all about timing and technique. These tips will help you nail that luscious molten center every single time and make your baking experience smoother and more enjoyable.
- Chill the Ganache Properly: Make sure to refrigerate the ganache for at least one hour until it's firm enough to shape. This prevents it from melting too quickly in the batter and ensures a gooey center.
- Use Room Temperature Eggs: I learned the hard way that cold eggs can cause the batter to seize or bake unevenly. Let your eggs sit out for about 30 minutes before starting.
- Don’t Overmix the Batter: Once you fold in the flour, gently combine everything just until mixed. Overmixing will make your cakes dense instead of tender and luscious.
- Watch Your Bake Time: Baking for exactly 20 minutes at 400°F is key. Baking longer will set the center too much, and shorter won't cook the outer cake enough. Set a timer and check carefully!
How to Serve Chocolate Molten Lava Cakes Recipe
Garnishes
Elevate your Chocolate Molten Lava Cakes by dusting them generously with powdered sugar right before serving. A scoop of creamy vanilla ice cream balances the richness perfectly, while fresh berries like raspberries, strawberries, or blueberries add a vibrant, tangy freshness. For an extra touch, a sprig of mint or a drizzle of caramel or raspberry sauce can take your presentation to the next level.
Side Dishes
Since these lava cakes are rich and indulgent on their own, you can keep side dishes light. Try serving with a simple mixed green salad lightly dressed with lemon vinaigrette or a refreshing citrus sorbet to cleanse the palate. If you're hosting a dinner party, pair with a robust coffee or a dessert wine like Port for a perfect ending.
Make Ahead and Storage
Storing Leftovers
If you happen to have leftovers (though that’s rare!), store your Chocolate Molten Lava Cakes in an airtight container in the refrigerator for up to 3 days. This keeps the cake moist and the ganache center intact, ready for a quick indulgence later.
Freezing
While freezing the fully baked cakes isn’t ideal since the delicate molten center may lose its texture, you can freeze the shaped cake batter before baking. Wrap ramekins tightly with plastic wrap and aluminum foil, then freeze for up to 1 month. When ready to enjoy, bake straight from frozen — just add an extra 5-7 minutes to the baking time.
Reheating
To reheat leftover lava cakes and restore that divine molten center, pop them in the microwave for 30 to 60 seconds. This softens the cake just enough without overcooking. Serve immediately with your favorite garnishes for an effortless dessert.
Frequently Asked Questions:
Absolutely! In fact, chilling the ganache for at least one hour before shaping it into balls is essential to achieve that molten center. You can even prepare it a day ahead and keep it refrigerated until ready to use.
If you don’t have ramekins, small oven-safe muffin tins can be used as an alternative. Just make sure to grease and flour the cups well for easy removal. The bake time might be slightly shorter, so keep an eye on the cakes.
Yes! The espresso powder enhances and intensifies the chocolate flavor but is optional. Your lava cakes will still be decadent and rich without it.
Bake for 20 minutes at 400°F. The edges should be set and firm while the center still looks slightly soft and gooey. This balance ensures a molten middle when you cut into the cake.
Final Thoughts
There's something truly magical about cracking into a warm Chocolate Molten Lava Cake and watching that luscious ganache flow out. This recipe combines simplicity with decadence, making it perfect whether you're treating yourself on a quiet night or impressing guests at your next dinner party. With these tips and serving ideas, I hope you feel confident and inspired to create these little moments of molten chocolate bliss in your own kitchen. Happy baking—and even happier indulging!

Leave a Reply