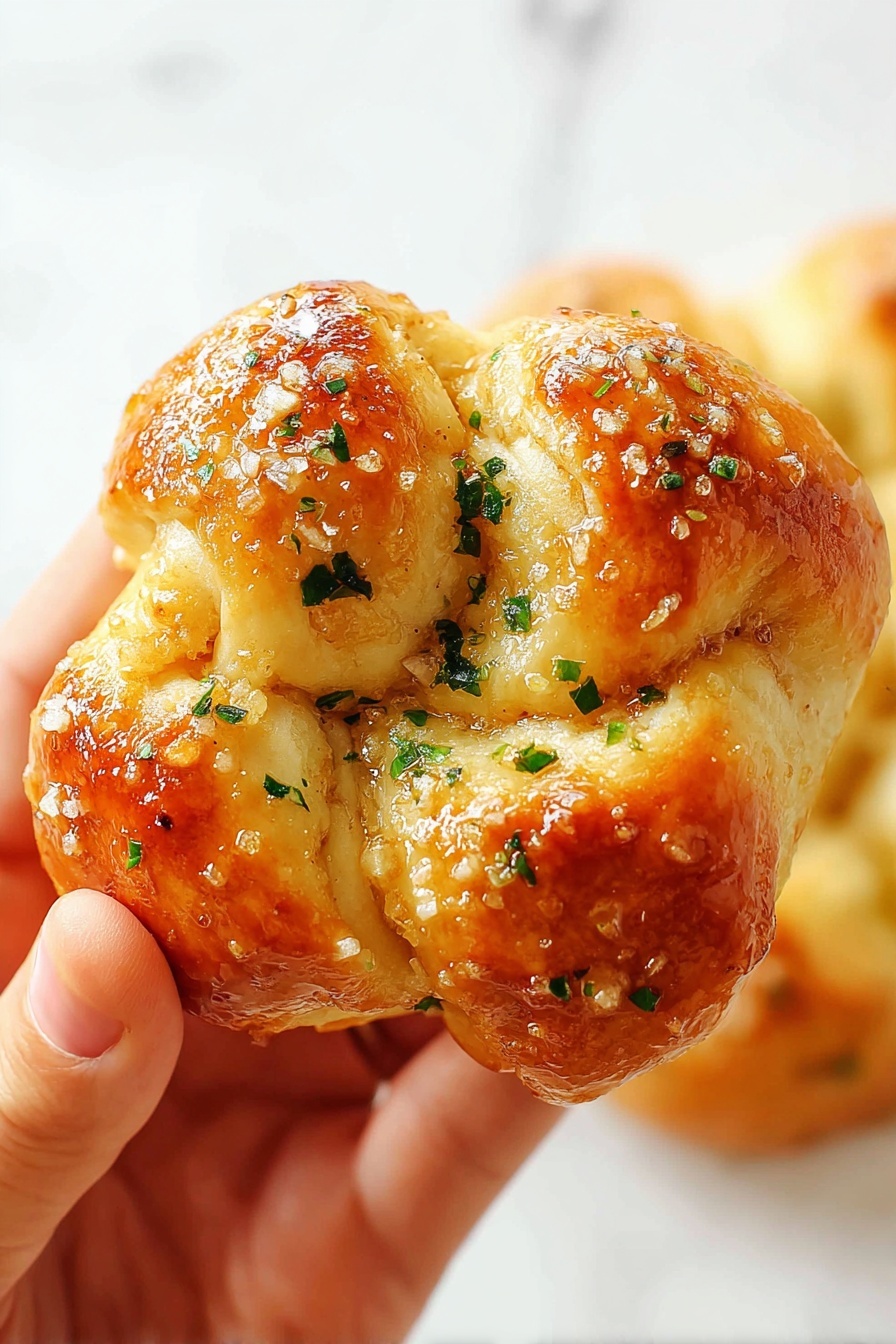
If you're craving a soft, buttery, and flavorful bite that melts in your mouth, you're going to adore this Crispy Garlic Knots Recipe. These little knots pack a punch of garlicky goodness wrapped in perfectly golden, tender dough—perfect for sharing or sneaking as you cook!

Jump to:
Why You'll Love This Recipe
I still remember the first time I made these garlic knots—they disappeared off the plate so fast, it was like magic! There's just something so comforting about lunching on soft bread infused with fragrant garlic butter.
- Simple ingredients: You probably have everything in your pantry already, making these a quick go-to snack.
- Ultimate flavor: The garlic butter topping elevates these knots with rich, fresh flavors.
- Soft yet crispy texture: Baked to golden perfection with that irresistible crust and tender inside.
- Perfect for any occasion: Whether it's a family dinner, game night, or pasta sidekick, these knots always impress.
Ingredients & Why They Work
Gathering your ingredients ahead is key to baking these garlic knots with ease. Here’s a little insight into what makes each component shine and some tips for shopping smart.
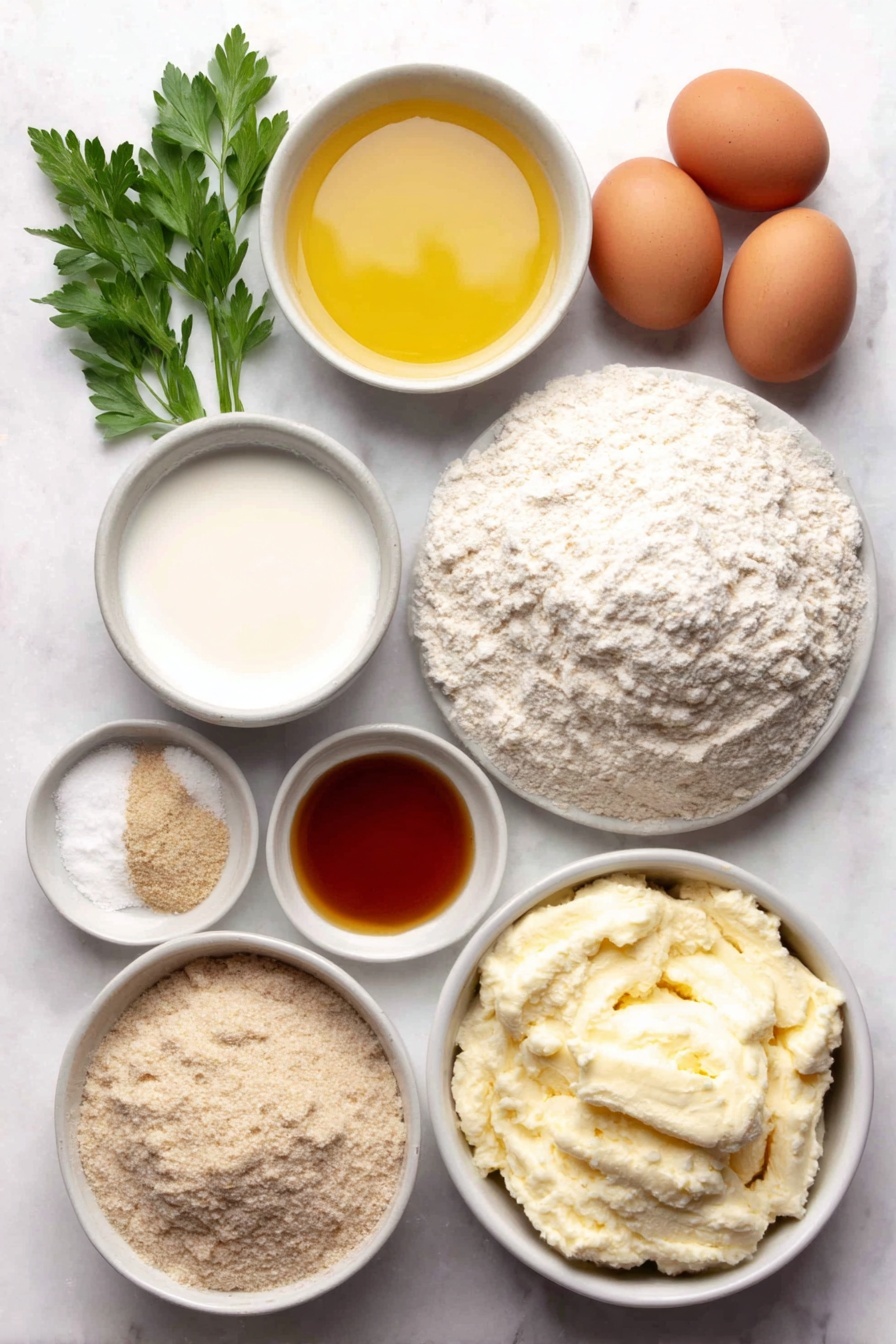
- Water: Acts as the base to hydrate your dough and activate the yeast properly.
- Melted butter: Adds richness to the dough and keeps it tender while baking.
- Milk: Enriches the dough, making it soft and a bit milky in flavor.
- Honey: A natural sweetener that feeds the yeast and adds a slight touch of sweetness.
- Active-dry yeast: The magic ingredient that makes the dough rise and become airy.
- All-purpose flour: Provides structure and chewiness for those perfect knots.
- Fine sea salt: Enhances the overall flavor of the dough without overpowering it.
- Garlic powder: Gives a subtle garlic hit infused inside the dough itself.
- Freshly-grated Parmesan cheese: Adds a salty, nutty layer when sprinkled over the warm knots.
- Flaky sea salt: Sprinkled on top for delightful bursts of saltiness and texture.
- Salted butter: Essential for the rich and flavorful garlic butter glaze.
- Finely-chopped fresh parsley: Brings freshness and a pop of color to the buttery topping.
Make It Your Way
One of the best things about a Crispy Garlic Knots Recipe is just how adaptable it can be. Feel free to tweak flavors or add your favorite ingredients to make every batch uniquely yours!
- Herb Variations: I love swapping fresh parsley in the garlic butter for a mix of rosemary and thyme when I’m craving a more woodsy, earthy note. It gives the knots a fragrant twist that pairs wonderfully with roasted dishes.
- Cheesy Upgrade: Adding shredded mozzarella or a pinch of asiago cheese inside each knot before tying them is my go-to for cheesy garlic bread lovers. It melts beautifully for an extra gooey surprise!
- Vegan-friendly version: Simply replace the milk and butter with plant-based alternatives like almond milk and vegan margarine. The knots still turn out soft and flavorful without missing a beat.
- Spicy Kick: If you enjoy a little heat, stirring in some red pepper flakes into the garlic butter or sprinkling them on top before baking adds a delightful zing.
- Seasonal Twist: During fall, I sometimes add roasted pumpkin puree or sweet potato to the dough for subtle sweetness and a beautiful orange color — it makes these garlic knots feel festive and comforting.
Step-by-Step: How I Make Crispy Garlic Knots Recipe
Step 1: Gently Warm and Combine the Liquids
Start by combining the water and melted butter in a microwave-safe bowl. Then add in the milk and honey, stirring until everything’s mixed in smoothly. Pop this mixture into the microwave for 1 minute to warm it up, stir, and then continue for 15-second bursts until it reaches about 110°F — warm enough to wake up the yeast, but never hot. Using a digital thermometer here really helps to get it just right and ensures your dough will rise beautifully.
Step 2: Activate the Yeast
Pour the warm liquid mixture into your stand mixer bowl and sprinkle the yeast evenly on top. Give it a quick swirl with a fork just to combine, then let it sit for 5 minutes. You’re looking for a foamy, bubbly surface — this means your yeast is happily waking up and ready to work its magic.
Step 3: Mix in the Dry Ingredients to Form Dough
Add 3 ½ cups of the all-purpose flour, the sea salt, and garlic powder into the yeast mixture. Use the dough hook attachment on medium-low speed to combine. If the dough feels sticky, sprinkle in flour gradually, up to ½ cup more. The dough should pull away from the sides of the bowl but still feel slightly tacky to the touch. Then keep mixing on low for another 4 to 5 minutes until the dough becomes smooth. Shape it into a ball and place it in a greased bowl.
Step 4: Let the Dough Rise
Cover your bowl with a damp towel and let the dough rest for 15 minutes. This short rise helps it relax and puff up just enough for those soft, fluffy knots.
Step 5: Prepare Your Oven and Pan
While the dough is resting, preheat your oven to 400°F. Line a baking sheet with parchment paper—this keeps the knots from sticking and makes cleanup a breeze.
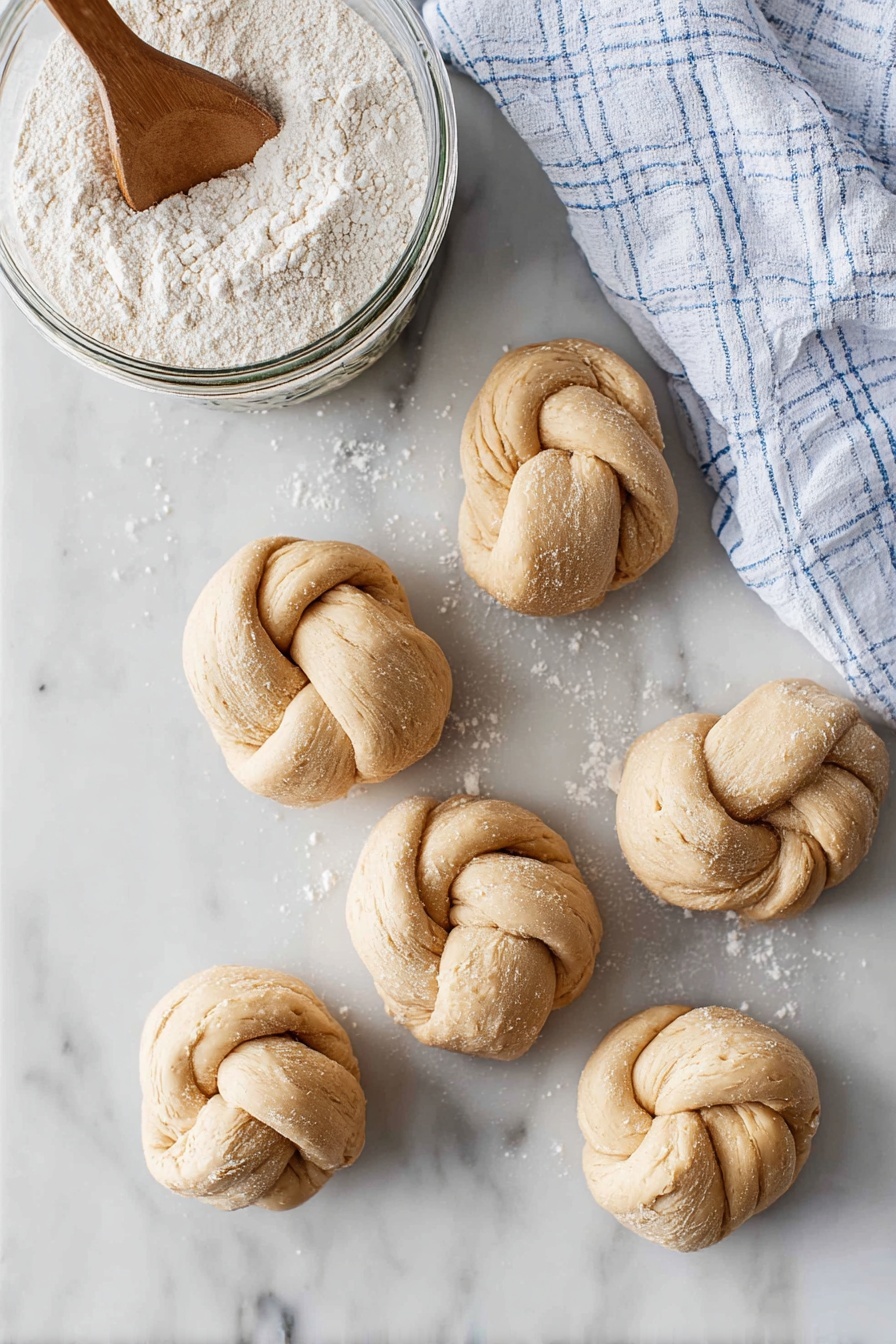
Step 6: Shape the Garlic Knots
Turn the dough out and gently roll it into a 16-inch log with an even thickness. Cut the log into 15 or 16 equal pieces. Roll each piece into an 8-inch rope, then tie it into a neat little knot, tucking the ends under or leaving them out depending on your style. Place them on your prepared baking sheet, cover loosely with a kitchen towel, and let them rise for another 15 minutes. You’ll notice them puffing just a bit—that’s perfect!
Step 7: Bake to Golden Perfection
Remove the towel and pop the knots in the oven. Bake for 15 minutes until the tops turn a lovely light golden brown and the knots bake through. While they’re baking, whisk together the melted butter, chopped fresh parsley, and garlic powder to make your garlic butter.
Step 8: Brush with Garlic Butter and Finish
The moment the knots come out, transfer the baking sheet to a wire rack. Brush each knot generously with the fragrant garlic butter while they’re piping hot — this step locks in all that buttery garlic goodness. Then sprinkle evenly with freshly grated Parmesan cheese and a pinch of flaky sea salt for a final burst of flavor and texture.
Step 9: Serve Warm and Enjoy!
Serve these irresistible garlic knots warm—perfect as a cozy appetizer or alongside your favorite pasta or salad. Trust me, they’ll be gone in no time!
Top Tip
Mastering the best Crispy Garlic Knots Recipe is all about attention to detail and little tricks that make your baking journey smoother and tastier.
- Perfect Dough Warmth: I always use a digital thermometer to make sure the liquid mixture is exactly 110°F. This temperature wakes up your yeast just right—too hot and you risk killing it, too cold and it won’t activate properly.
- Flour Gradually: When mixing the dough, avoid adding all the flour at once. I learned that adding flour little by little until the dough pulls away from the bowl but stays slightly sticky gives the softest knots.
- Brush Immediately: Brushing the garlic butter right out of the oven lets the knots soak up every bit of that flavorful butter, making them irresistibly fragrant and crispy on the edges.
- Don’t Skip the Rise: Letting the dough rise twice—before and after shaping—is crucial to getting those light, fluffy garlic knots instead of dense bread rolls.
How to Serve Crispy Garlic Knots Recipe
Garnishes
These garlic knots are delightfully enhanced with freshly-grated Parmesan cheese and a sprinkle of flaky sea salt right after brushing with garlic butter. For a fresh twist, add a touch of finely chopped parsley or even a light dusting of red pepper flakes to kick up the flavor a notch.
Side Dishes
Crispy Garlic Knots pair wonderfully with classic Italian dishes like spaghetti marinara, creamy fettuccine Alfredo, or a zesty Caesar salad. They also make an incredible appetizer alongside a bowl of warm tomato soup or served with a platter of antipasto for a crowd-pleasing starter.
Make Ahead and Storage
Storing Leftovers
If you have leftover garlic knots, store them in an airtight container at room temperature where they’ll stay fresh for up to 2 days. This keeps their texture soft but delicious.
Freezing
To freeze your garlic knots, place them in a freezer-safe airtight container or bag for up to 1 month. You can freeze them either before baking (shape and then freeze) or after baking and cooling for easy future meals.
Reheating
Reheat frozen garlic knots in a 350°F oven for 8-10 minutes until warmed through and slightly crispy again. This revives their fresh-from-the-oven taste and texture beautifully.
Frequently Asked Questions:
Active-dry yeast is recommended because it activates well at the specified temperature (110°F). However, instant yeast can be used as a substitute—reduce the amount slightly and mix it directly into the dry ingredients. The dough may rise a bit faster.
The first rise helps develop the gluten structure and flavor, while the second rise after shaping makes the knots light and fluffy with a tender crumb. Skipping either can result in tougher bread.
It's normal for the dough to be slightly sticky. If it's excessively sticky and hard to handle, add flour a tablespoon at a time until it’s workable. Avoid adding too much flour to keep your knots soft and tender.
For extra crispiness, bake the knots a few minutes longer until they achieve a deeper golden brown, or brush lightly with olive oil in addition to the garlic butter before baking.
Final Thoughts
There’s something utterly comforting about pulling warm, buttery, garlicky knots fresh from the oven — and this Crispy Garlic Knots Recipe really delivers. With just a handful of simple ingredients and some little tricks from the heart, you can create a batch that feels both rustic and special. Perfect for sharing with friends or savoring as a cozy snack, these knots have quickly become a favorite in my kitchen. I hope they find a warm spot on your table, too!
Print
Crispy Garlic Knots Recipe
- Prep Time: 1 hour
- Cook Time: 15 minutes
- Total Time: 1 hour 15 minutes
- Yield: 16 servings
- Category: Appetizer
- Method: Baking
- Cuisine: Italian
- Diet: Vegetarian
Description
These Garlic Knots are soft, buttery, and packed with garlicky flavor. Made from a simple yeast dough enriched with milk and butter, then tied into knots, baked to golden perfection, and brushed with a fragrant garlic butter topping. Perfect as an appetizer or side dish to pasta and salad.
Ingredients
Garlic Knots Dough
- 1 cup water
- 2 tablespoons melted butter
- ½ cup milk
- 2 tablespoons honey
- 1 tablespoon active-dry yeast
- 3 ½ to 4 cups all-purpose flour
- 1 teaspoon fine sea salt
- ½ teaspoon garlic powder
Toppings
- Freshly-grated Parmesan cheese
- Flaky sea salt
Garlic Butter
- 4 tablespoons salted butter, melted
- 1 tablespoon finely-chopped fresh parsley
- ½ teaspoon garlic powder
Instructions
- Heat the liquids: In a microwave-safe bowl, combine water and melted butter, then add milk and honey and stir until combined. Microwave for 1 minute, stir, then continue microwaving in 15 second intervals until mixture reaches 110°F, warm but not hot to touch.
- Add yeast: Pour the warm liquid mixture into the bowl of a stand mixer. Sprinkle yeast evenly over the top, stir briefly with a fork, then let rest for 5 minutes until foamy.
- Add dry ingredients: Add 3 ½ cups flour, sea salt, and garlic powder to the yeast mixture. Using the dough hook, mix on medium-low until combined. If dough is sticky, add up to ½ cup more flour gradually until dough pulls from bowl sides and is slightly sticky. Continue mixing on low for 4-5 minutes until dough is smooth. Shape into a ball and place in a greased bowl.
- Let the dough rise: Cover the bowl with a damp towel and let rise for 15 minutes until slightly puffed.
- Prep oven and baking sheet: Preheat oven to 400°F. Line a baking sheet with parchment paper.
- Form the garlic knots: Shape the dough into a 16-inch long log with even thickness. Cut into 15 or 16 equal pieces. Roll each piece into an 8-inch rope and tie into a knot. Place knots on prepared baking sheet. Cover loosely with kitchen towel and let rise for 15 minutes.
- Bake: Remove towel and bake knots for 15 minutes until lightly golden and cooked through. Meanwhile, whisk melted butter, parsley, and garlic powder to prepare garlic butter.
- Brush with garlic butter: As soon as garlic knots come out of the oven, transfer baking sheet to a wire rack. Immediately brush garlic butter over each knot, then sprinkle with Parmesan cheese and flaky sea salt.
- Serve: Serve warm and enjoy these flavorful garlic knots as a delicious appetizer or side.
Notes
- Use a digital thermometer for accurately warming liquids to 110°F to activate the yeast properly.
- If dough is too sticky after adding all 4 cups flour, add a tablespoon more at a time until workable.
- Fresh parsley in garlic butter can be swapped with dried parsley in a pinch, but fresh adds better flavor.
- Brush the knots immediately after baking to maximize buttery garlic absorption.
- These garlic knots can be stored in an airtight container at room temperature for 2 days or frozen for up to 1 month.
- Reheat frozen knots in a 350°F oven for 8-10 minutes until warmed through.
Nutrition
- Serving Size: 1 knot
- Calories: 125 kcal
- Sugar: 1.5 g
- Sodium: 130 mg
- Fat: 4.5 g
- Saturated Fat: 2.5 g
- Unsaturated Fat: 2 g
- Trans Fat: 0 g
- Carbohydrates: 17 g
- Fiber: 1 g
- Protein: 3 g
- Cholesterol: 12 mg


Leave a Reply