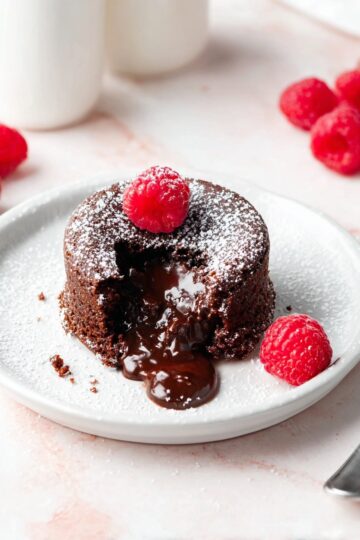
Imagine biting into a warm, rich chocolate cake with a molten peanut butter center that spills out with every forkful. That’s exactly what this Peanut Butter Chocolate Lava Cakes Recipe delivers—an unforgettable, indulgent dessert that’s surprisingly quick and easy to make.

Jump to:
- Why You'll Love This Recipe
- Ingredients & Why They Work
- Make It Your Way
- Step-by-Step: How I Make Peanut Butter Chocolate Lava Cakes Recipe
- Top Tip
- How to Serve Peanut Butter Chocolate Lava Cakes Recipe
- Make Ahead and Storage
- Frequently Asked Questions:
- Final Thoughts
- Peanut Butter Chocolate Lava Cakes Recipe
Why You'll Love This Recipe
I have to admit, when I first combined peanut butter with molten chocolate lava cakes, I wasn’t sure what to expect. But the way that creamy peanut butter melts right inside the semi-sweet chocolate batter? Pure magic!
- Quick to bake: These cakes are ready in just 12 to 13 minutes in the oven, perfect for last-minute dessert cravings.
- Individual servings: Everyone gets their own perfect molten cake, easy to serve and impossible to resist.
- Rich, balanced flavor: The semi-sweet chocolate complements the creamy peanut butter, creating a luscious chocolate-peanut butter harmony.
- Versatile toppings: Ice cream, melted peanut butter, or chocolate syrup can take this dessert to the next level—totally your call.
Ingredients & Why They Work
When it comes to a delicate dessert like this, quality and the right type of each ingredient really make a difference. For instance, choosing a high quality semi-sweet chocolate and a smooth, commercial peanut butter will bring out the best flavors and textures.
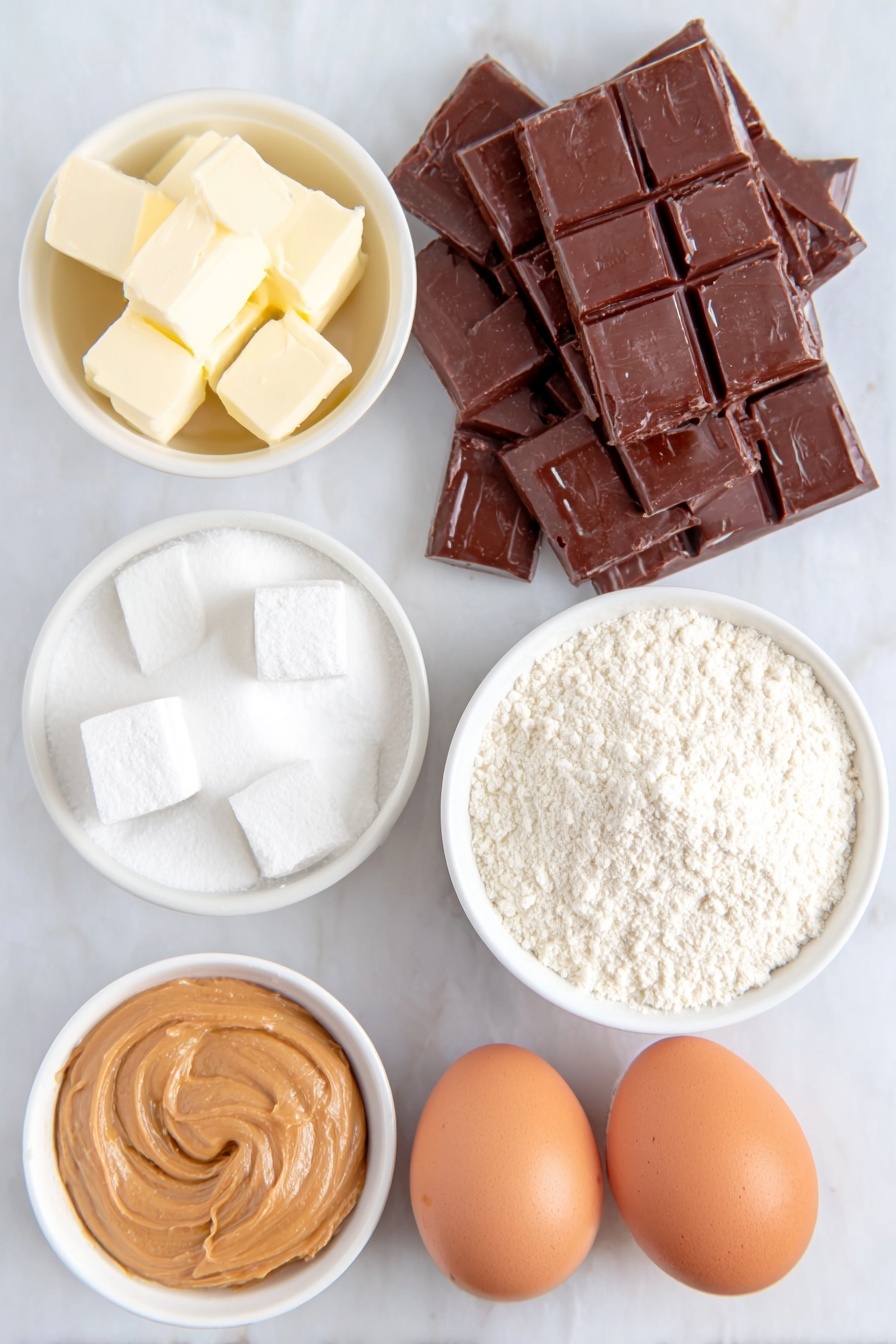
- Semi-sweet chocolate: I prefer brands like Ghirardelli or Lindt for their smooth melt and rich flavor that balances the peanut butter beautifully.
- Unsalted butter: Gives the batter a luscious mouthfeel without adding any unwanted saltiness that could overpower the sweet and nutty flavors.
- All-purpose flour: Helps structure the cake just enough to hold the gooey center while keeping the outside tender.
- Confectioners’ sugar: Adds sweetness and a bit of lightness to the batter.
- Salt: Just a pinch enhances all the flavors without making the cake taste salty.
- Whole eggs and egg yolks: These provide richness and create the perfect texture, making the cake tender but sturdy enough to hold its shape.
- Creamy peanut butter: Use commercial creamy varieties like Jif or Skippy; they melt beautifully and complement the chocolate with a smooth, nutty richness.
Make It Your Way
One of the best things about this Peanut Butter Chocolate Lava Cakes Recipe is how easily you can customize it to suit your cravings or dietary needs. Whether you want to keep it classic or try something new, these little molten delights are incredibly versatile.
- Peanut Butter Swap: I’ve experimented with using different nut butters, but for the creamiest, gooey center, sticking to a smooth, commercial peanut butter like Jif or Skippy really gives the best melt and texture. Trust me, natural or crunchy peanut butters just don’t behave the same way inside the lava cake.
- Plain Chocolate Version: If you're not a peanut butter fan, no worries! I simply skip the peanut butter dollop and bake the cakes for the same 12 to 13 minutes. The rich molten chocolate center is still a showstopper on its own.
- Muffin Pan Method: Don’t have 6-ounce ramekins? No problem! I use a muffin pan to make six smaller cakes, baking them for about 8 to 10 minutes at 425°F (218°C). They’re just as delicious, perfect for sharing at a party.
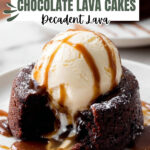
- Serving Extras: Toppings can turn these cakes from delightful to downright decadent. I love adding a scoop of vanilla ice cream, then drizzling melted peanut butter and chocolate syrup on top. It’s the kind of dessert that feels fancy but comes together in no time.
Step-by-Step: How I Make Peanut Butter Chocolate Lava Cakes Recipe
Step 1: Prep the Ramekins for a Flawless Release
The first thing I do is spray four 6-ounce ramekins with nonstick cooking spray, then dust them generously with cocoa powder. This little step is a game-changer because it makes flipping the cakes out onto your plates a breeze—no sticky messes or broken edges. I find that cocoa powder works better than flour here since it enhances the chocolate flavor even more!
Step 2: Heat Your Oven to Perfection
Next, preheat your oven to 425 degrees Fahrenheit (218 degrees Celsius). This high temperature is key to baking these lava cakes just right—firm edges with a molten peanut butter center. I usually make sure the oven is fully heated before moving on to the batter, so the timing stays spot on.
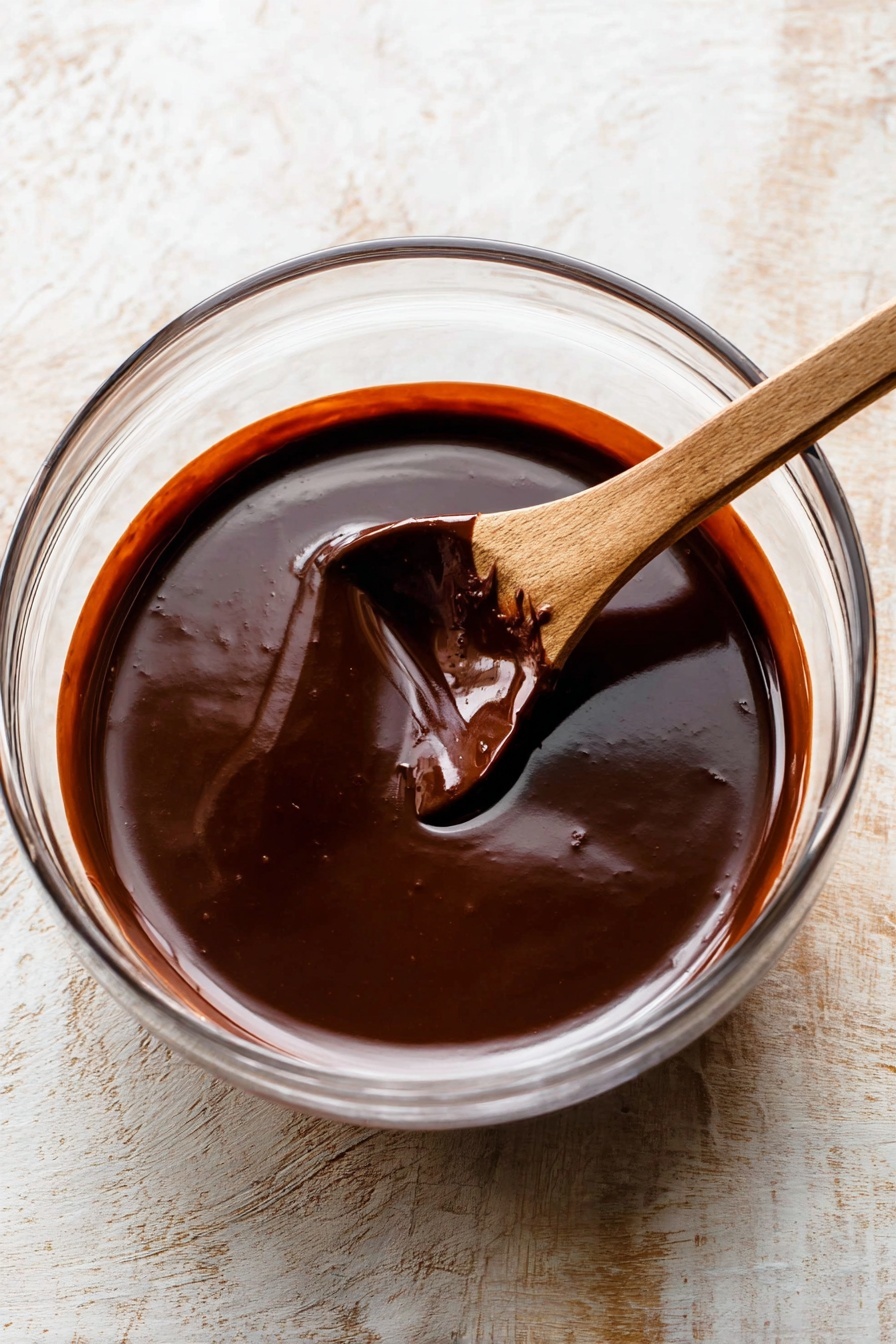
Step 3: Melt Chocolate and Butter Until Silky Smooth
Coarsely chopping the semi-sweet chocolate helps it melt evenly and quickly. I place the ½ cup (113g) unsalted butter in a medium heat-proof bowl, add the chopped chocolate on top, then microwave the mixture in 10-second bursts on high, stirring after each burst. This prevents seizing and results in a glossy, smooth blend that’s perfect for the batter. Once melted, I let it cool just a little so it doesn’t cook the eggs in the next step.
Step 4: Whisk Together Your Dry and Wet Ingredients
While the chocolate cools, I combine ¼ cup (31g) all-purpose flour, ½ cup (60g) confectioners’ sugar, and ⅛ teaspoon salt in a small bowl and whisk them until well blended. In another bowl, I whisk the two large eggs plus two large egg yolks until slightly frothy. This aeration helps give the cakes a light texture while still keeping the center wonderfully molten.
Step 5: Gently Fold Together to Create the Batter
Pouring the dry ingredients and eggs into the bowl with the melted chocolate and butter, I slowly stir everything together with a silicone spatula or wooden spoon. The batter should come together into a thick, glossy mixture. If I spot any lumps, I’ll gently whisk them out so the batter stays smooth and luscious.
Step 6: Fill Ramekins and Add That Gooey Peanut Butter Center
I spoon the chocolate batter evenly into each prepared ramekin. Then comes the best part—using about 2 teaspoons of creamy peanut butter per cake, I dollop it right in the center and gently press it slightly into the batter. Some peanut butter peeks out on top, giving a beautiful molten pool inside after baking.
Step 7: Bake, Cool Briefly, and Unmold with Care
The ramekins go onto a baking sheet and into that perfectly preheated oven for 12 to 13 minutes. You want the edges to look set and firm while the center remains soft and a bit jiggly. After baking, I let them cool for exactly 1 minute to avoid burns but still keep the lava effect. Then, using an inverted plate and oven mitts, I flip each ramekin over carefully—the cakes slip right out, ready to wow.
Step 8: Serve Immediately with Your Favorite Toppings
The final touch is the fun part: I serve the cakes warm alongside a scoop of ice cream, and I drizzle extra melted peanut butter and chocolate syrup on top for indulgence. But honestly, even plain, they’re pure happiness on a plate. These are best enjoyed right away while that molten center is gloriously gooey.
Top Tip
Making the perfect Peanut Butter Chocolate Lava Cakes Recipe is all about balancing that gooey center with a tender outer cake. These tips will help you get it just right every single time.
- Prepare Your Ramekins Well: Spraying and dusting ramekins with cocoa powder is a game changer. It helps the cakes release easily without breaking, maintaining that smooth edge and molten center.
- Keep an Eye on Baking Time: I’ve learned that going over 13 minutes makes the center less gooey. Set a timer to catch that perfect window when the edges are firm but the middle is still soft.
- Use Creamy Commercial Peanut Butter: Avoid natural or crunchy peanut butter—creamy Jif or Skippy melts flawlessly, ensuring that delicious molten peanut butter center instead of a gritty or oily mess.
- Cool Just a Minute Before Flipping: Waiting too long to invert cools the lava and makes it hard to release. Just one minute gives the cake enough structure without sacrificing that luscious molten core.
How to Serve Peanut Butter Chocolate Lava Cakes Recipe
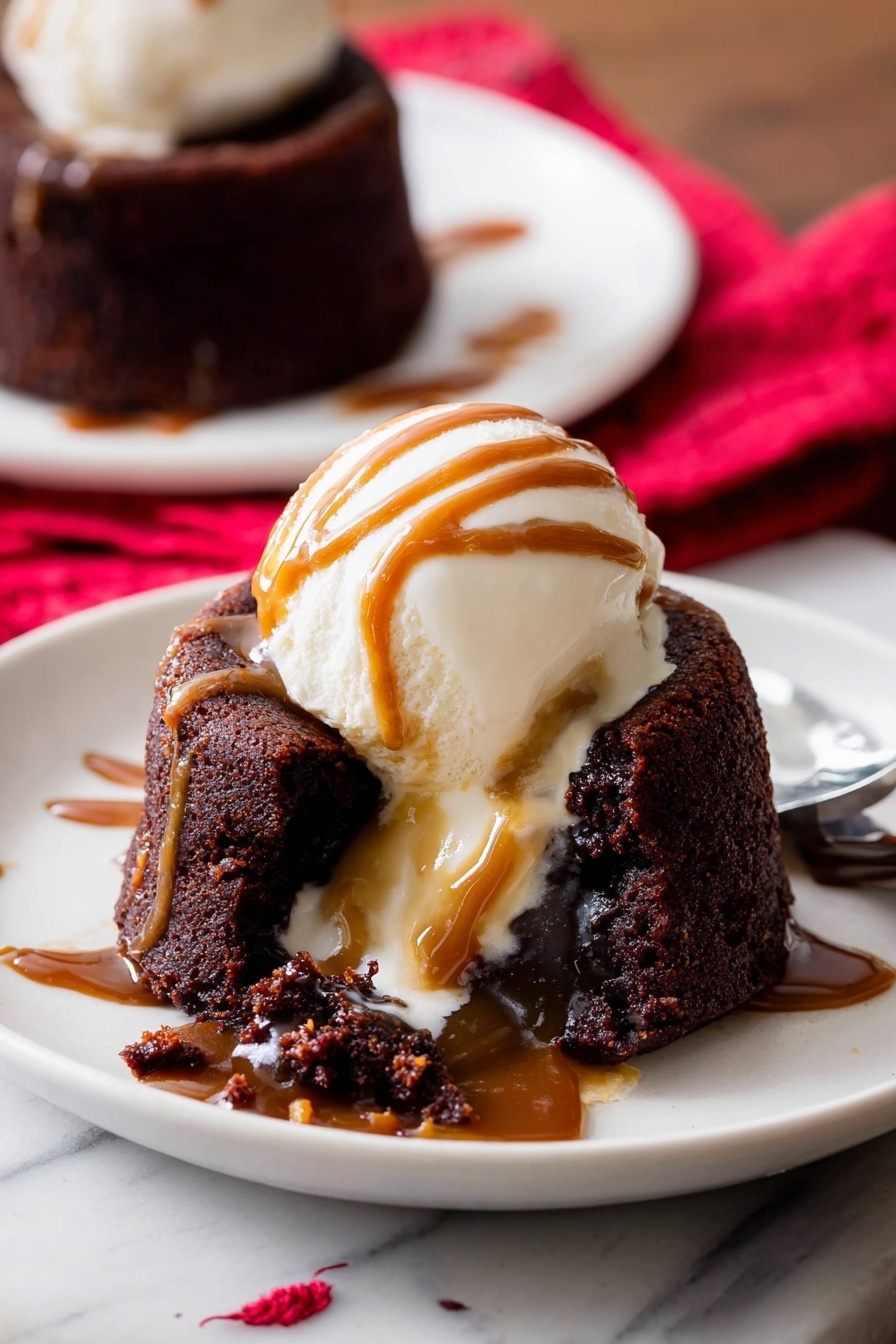
Garnishes
These lava cakes are indulgent enough on their own, but adding a scoop of vanilla or salted caramel ice cream on top takes them to the next level. Drizzling melted peanut butter or chocolate syrup creates beautiful contrast and adds even more richness. For a fresh element, sprinkle lightly chopped roasted peanuts or a pinch of flaky sea salt to highlight the peanut butter flavor.
Side Dishes
Serve your Peanut Butter Chocolate Lava Cakes with fresh berries like raspberries or sliced strawberries to add a bright, tart counterpoint to the rich dessert. A small bowl of whipped cream or a light fruit compote also balances the decadence nicely. If you want a cozy, warm touch, pair with a cup of freshly brewed coffee or black tea.
Make Ahead and Storage
Storing Leftovers
Any leftover cakes are best stored in airtight containers in the refrigerator and eaten within 1 to 2 days. Because the molten center starts to set as it cools, they won’t have quite the same liquid texture when cold but can still be warmed for that fresh-out-of-the-oven effect.
Freezing
You can freeze unbaked batter portioned in the ramekins, covered tightly with plastic wrap or foil, for up to 1 month. When ready, thaw overnight in the refrigerator and come to room temperature before baking. If freezing baked lava cakes, place them on a tray until firm, then wrap individually and freeze; reheat gently in the oven before serving.
Reheating
The best way to reheat is in a 350°F (175°C) oven for about 5 to 7 minutes—this warms the center without drying out the cake. You can also microwave for about 20 seconds but watch closely to avoid overheating or hardening the edges.
Frequently Asked Questions:
For the best molten center and smooth texture, use creamy commercial peanut butter like Jif or Skippy. Natural or crunchy peanut butter contains oils and textures that don’t melt as well and can separate or make the lava less smooth.
The edges should be set and firm while the centers are still slightly soft and wobble a bit. Typically, baking for 12 to 13 minutes at 425°F (218°C) hits this sweet spot. Overbaking will cause a fully set center, losing the molten effect.
Yes! Grease and dust 6 muffin cups with cocoa powder, spoon the batter in, add peanut butter centers, and bake at 425°F (218°C) for 8 to 10 minutes. The cakes will be smaller but just as delicious.
Absolutely! You can prepare the batter through step 6, cover it tightly, and refrigerate it for up to 1 day. Bring it to room temperature before filling ramekins and baking to ensure proper texture and melting.
Final Thoughts
There’s something truly magical about lifting the spoon from a warm Peanut Butter Chocolate Lava Cake and watching that molten peanut butter center slowly ooze out. This recipe marries the richness of semi-sweet chocolate with the creamy comfort of peanut butter, creating a dessert that feels like a warm hug. Whether you’re making it for a special occasion or a cozy night in, these lava cakes never fail to delight. So grab your ramekins, indulge in the process, and treat yourself to this luscious, melt-in-your-mouth experience—you deserve it!
Print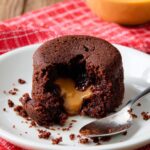
Peanut Butter Chocolate Lava Cakes Recipe
- Prep Time: 15 minutes
- Cook Time: 13 minutes
- Total Time: 35 minutes
- Yield: 4 cakes
- Category: Dessert
- Method: Baking
- Cuisine: American
- Diet: Vegetarian
Description
Delight in these irresistible Peanut Butter Chocolate Lava Cakes featuring a rich semi-sweet chocolate batter with a molten peanut butter center. Perfect as an indulgent dessert, these individual cakes bake quickly to perfection with a gooey core that pairs wonderfully with ice cream or drizzled chocolate syrup.
Ingredients
Main Ingredients
- 6 ounces high quality semi-sweet chocolate
- ½ cup unsalted butter (8 tablespoons; 113 grams)
- ¼ cup all-purpose flour (31 grams, spooned & leveled)
- ½ cup confectioners’ sugar (60 grams)
- ⅛ teaspoon salt
- 2 large eggs
- 2 large egg yolks
- 8 teaspoons creamy peanut butter (42 grams, about 2 teaspoons per cake)
Optional for Serving
- Ice cream
- Melted peanut butter
- Chocolate syrup
Instructions
- Prepare Ramekins: Spray four 6-ounce ramekins with nonstick cooking spray and dust them with cocoa powder. This step ensures the lava cakes will release smoothly after baking when inverted onto plates.
- Preheat Oven: Set your oven to 425 degrees Fahrenheit (218 degrees Celsius) to reach the perfect baking temperature for the cakes.
- Melt Chocolate and Butter: Coarsely chop the chocolate. Place the butter in a medium heat-proof bowl and add the chopped chocolate on top. Microwave on high in 10-second increments, stirring well after each, until the mixture is completely smooth. Set aside to cool slightly.
- Mix Dry Ingredients: In a small bowl, whisk together the all-purpose flour, confectioners’ sugar, and salt until well combined.
- Combine Eggs: In another small bowl, whisk the two whole eggs and two egg yolks until fully combined and slightly frothy.
- Create Batter: Add the flour mixture and eggs into the bowl with the melted chocolate and butter. Slowly stir together with a silicone spatula or wooden spoon until smooth. If any lumps remain, gently whisk until the batter is slightly thick and uniform.
- Fill Ramekins and Add Peanut Butter: Spoon the chocolate batter evenly into each prepared ramekin. Spoon about 2 teaspoons of creamy peanut butter onto the center of each cake and gently press it down slightly into the batter; some peanut butter may remain visible on top.
- Bake Cakes: Place the ramekins on a baking sheet and bake in the preheated oven for 12 to 13 minutes, until the edges are firm but the center is still slightly soft and gooey.
- Cool and Invert: Allow the cakes to cool for 1 minute after baking. Then, cover each ramekin with an inverted plate and, using oven mitts for safety, carefully flip them over. The lava cakes should easily release from the ramekins.
- Serve: Serve immediately topped with optional ice cream and drizzles of melted peanut butter or chocolate syrup for an extra indulgent touch.
Notes
- You can prepare the batter through step 6 ahead of time, cover tightly, and refrigerate for up to 1 day. Bring to room temperature before baking.
- Use only creamy commercial peanut butter such as Jif or Skippy to achieve the best texture and melt; avoid natural or crunchy varieties and other nut butters.
- If you don’t have 6-ounce ramekins, a muffin pan can be used instead: grease and dust 6 cups with cocoa powder, fill with batter, and bake at 425°F (218°C) for 8 to 10 minutes. Your cakes will be smaller.
- For plain lava cakes without peanut butter, simply omit the peanut butter and bake for the same 12 to 13 minutes.
- Recommended ramekins are 6-ounce oven-proof custard cups; baking times may vary with different sizes.
Nutrition
- Serving Size: 1 cake
- Calories: 410 kcal
- Sugar: 30 g
- Sodium: 150 mg
- Fat: 27 g
- Saturated Fat: 12 g
- Unsaturated Fat: 13 g
- Trans Fat: 0 g
- Carbohydrates: 36 g
- Fiber: 3 g
- Protein: 7 g
- Cholesterol: 140 mg

Leave a Reply