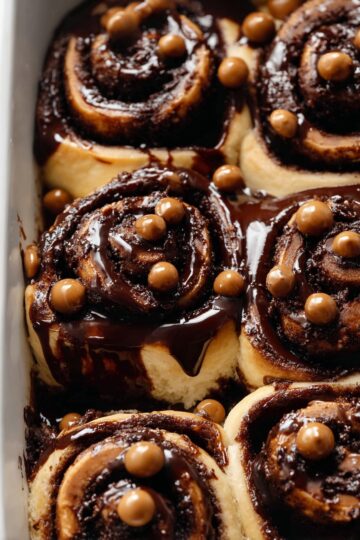
There’s something irresistibly beautiful about making breakfast a bit special with the Red Velvet Waffles with Cream Cheese Glaze Recipe. With those vibrant red waffles topped by silky cream cheese glaze, it’s a feast for your eyes and taste buds alike — guaranteed to brighten your morning!

Jump to:
- Why You'll Love This Recipe
- Ingredients & Why They Work
- Make It Your Way
- Step-by-Step: How I Make Red Velvet Waffles with Cream Cheese Glaze Recipe
- Top Tip
- How to Serve Red Velvet Waffles with Cream Cheese Glaze Recipe
- Make Ahead and Storage
- Frequently Asked Questions:
- Final Thoughts
- Red Velvet Waffles with Cream Cheese Glaze Recipe
Why You'll Love This Recipe
When I first made these red velvet waffles, the rich cocoa undertone combined with the tangy cream cheese glaze instantly turned a regular weekend breakfast into something to celebrate. It’s just one of those recipes that feels festive and comforting all at once — perfect for sharing with family or treating yourself.
- Vibrant and Delicious: The bright red color paired with a chocolatey hint makes every bite feel special.
- Simple to Make: Using Bisquick and easy pantry staples means you’re minutes away from waffles.
- Perfect Balance: The cream cheese glaze adds just the right touch of tangy sweetness without overpowering the waffle.
- Flexible Recipe: You can tweak sweetness and thickness of the glaze to suit your taste perfectly.

Ingredients & Why They Work
Each ingredient in the Red Velvet Waffles with Cream Cheese Glaze Recipe plays its part to create those soft, fluffy waffles with a vivid red hue and a luscious, smooth glaze. Here's why these work so well together and some tips on picking the best versions.

- Bisquick mix: This pre-mixed blend saves you measuring multiple ingredients and ensures a consistent, fluffy waffle texture every time.
- Brown sugar: Adds a subtle molasses flavor that deepens the waffle’s richness without making it overly sweet.
- Unsweetened cocoa powder: Gives the waffles their classic red velvet chocolate taste, balancing color and flavor perfectly.
- Buttermilk: Provides tanginess and reacts with baking agents to create light, tender waffles. If you're out, a quick milk and vinegar mix works too!
- Red gel food coloring: Gel color works best because it’s more vibrant and concentrated, so you get that iconic red without thinning your batter.
- Egg: Binds the ingredients and contributes to the waffles’ airy structure.
- Melted butter: Adds richness and improves crispiness on the outside.
- Vanilla extract: Enhances all the flavors, smoothing out the cocoa and sugar notes.
- Cream cheese (for glaze): Softened cream cheese blends into a divine glaze that’s creamy with a hint of tangy sweetness.
- Butter (for glaze): Gives the glaze that luscious, smooth texture and richness.
- Powdered sugar: Sweetens the glaze while keeping it silky and lump-free.
- Whole milk (for glaze): Adjusts the glaze consistency, making it pourable or thick as you prefer.
Make It Your Way
I love giving this recipe little tweaks based on the mood or occasion, and you might find yourself doing the same! Whether you want to dial back the sweetness or add your favorite toppings, this recipe is an excellent canvas.
- Less Sweet Variation: Sometimes I skip the brown sugar in the waffles; since the cream cheese glaze is already sweet, this balances everything nicely.
- Dairy-Free Option: I’ve swapped whole milk for almond or oat milk with good success—just make sure to use a dairy-free cream cheese for the glaze!
- Extra Flair: Adding a pinch of cinnamon or espresso powder to the batter boosts depth, which I did once for brunch—it was a hit!
- Thicker Glaze: Using less milk makes the cream cheese glaze more like frosting, perfect for spreading if you want that indulgence.
Step-by-Step: How I Make Red Velvet Waffles with Cream Cheese Glaze Recipe
Step 1: Whip Up the Cream Cheese Glaze
Start by beating the softened butter and cream cheese until you get a silky, smooth mixture with no lumps. I like to scrape down the sides several times so it’s perfectly lump-free. Then add the powdered sugar bit by bit and keep beating until the mix is light and fluffy. Finally, stir in the milk and vanilla extract. Adjust the milk to get your preferred glaze thickness — more for drizzle, less for spread!
Step 2: Mix the Waffle Batter
In a medium bowl, whisk together the Bisquick, brown sugar, and cocoa powder until evenly combined. Next, add the buttermilk, whole milk, red gel food coloring, egg, melted butter, and vanilla extract. Whisk everything together until the batter is smooth and consistent. If you want extra fluffy waffles, give the batter a final gentle whisk just before cooking.
Step 3: Cook the Waffles
Preheat your waffle iron and lightly grease it if needed. Pour about ¾ cup of the batter into the center, then close the lid. Cook for about 5 minutes, but keep an eye on your specific waffle iron’s manual for best timing. You’ll know they’re done when the waffles easily pull away without sticking, and the edges look slightly crispy with a little browning. Serve warm topped generously with that dreamy cream cheese glaze.
Top Tip
After making red velvet waffles several times, I realized small details really elevate the result and ease your waffle-making process.
- Food Coloring Choice: Use gel-based red food coloring—it gives a vibrant color without thinning out the batter.
- Consistent Glaze Texture: Beat your cream cheese glaze long enough to avoid lumps and get that glossy, luscious finish.
- Don’t Overmix Batter: Stir until combined but no more than that; overmixing can make waffles tough instead of tender.
- Timing Is Everything: Check waffles when cooking starts to smell nutty and edges crisp—they should release easily before opening the iron fully.
How to Serve Red Velvet Waffles with Cream Cheese Glaze Recipe

Garnishes
I often love topping these waffles with fresh berries like strawberries or raspberries— their slight tartness pairs beautifully with the sweet glaze. A sprinkle of powdered sugar or even some chopped pecans gives nice texture and a pretty finishing touch. For special occasions, I’ve added edible flowers which made the plate pop visually!
Side Dishes
My go-to sides include crispy bacon or sausage links for a savory contrast, plus a side of scrambled eggs for extra protein. If you prefer a lighter pairing, a fresh fruit salad or a dollop of Greek yogurt complement these waffles beautifully.
Creative Ways to Present
For Valentine’s Day brunch or birthday surprises, I’ve stacked the waffles like a layer cake, spreading cream cheese glaze between each layer, and topped with sprinkles or mini chocolate chips. It’s a stunning, crowd-pleasing presentation that feels like a dessert breakfast!
Make Ahead and Storage
Storing Leftovers
Leftover red velvet waffles store beautifully in an airtight container in the fridge for up to 3 days. I find they stay surprisingly soft inside, but still crisp up nicely when reheated.
Freezing
If you want to prep ahead, these waffles freeze well. Lay them flat on a baking sheet to freeze individually before stacking in a freezer bag, so they don’t stick together. They keep great for up to 2 months.
Reheating
I reheat frozen waffles in a toaster or oven to bring back that fresh-cooked crispiness. After reheating, drizzle the cream cheese glaze and enjoy a freshly-tasting breakfast any day!
Frequently Asked Questions:
Absolutely! You can make the cream cheese glaze a day ahead and store it in the fridge. Just give it a good stir or whisk before drizzling—it might thicken a bit when chilled, but a splash of milk fixes that easily.
No worries! You can make a buttermilk substitute by adding 1 tablespoon of white vinegar or lemon juice to 1 cup of regular milk. Let it sit for 5 minutes until it thickens and curdles slightly, then use it just like buttermilk in the recipe.
The trick is using melted butter in the batter and not opening the waffle iron too early during cooking. Melted butter helps develop that golden crisp crust, while the cooking time ensures the inside cooks through and stays soft. Also, preheating your waffle iron properly is key.
You can, but gel food coloring is better because it’s more concentrated and doesn’t thin the batter, giving your waffles a richer red color. If you use liquid food coloring, you might need more drops, which could alter the consistency of your batter slightly.
Final Thoughts
Making this Red Velvet Waffles with Cream Cheese Glaze Recipe has become one of my favorite ways to bring a little celebration to my mornings. It’s easy enough to whip up any day, but special enough to impress guests or make weekends feel indulgent. Trust me, once you try this, you’ll find yourself craving those rich red waffles topped with smooth, tangy glaze again and again. Give it a go, and I’m sure this will become your go-to for a cozy breakfast treat.
Print
Red Velvet Waffles with Cream Cheese Glaze Recipe
- Prep Time: 10 minutes
- Cook Time: 5 minutes
- Total Time: 15 minutes
- Yield: 6 servings
- Category: Breakfast
- Method: Stovetop
- Cuisine: American
Description
Deliciously fluffy red velvet waffles topped with a smooth cream cheese glaze, perfect for a special breakfast or brunch treat. These waffles combine classic red velvet flavors with a rich, creamy glaze for an indulgent start to your day.
Ingredients
Cream Cheese Glaze
- 4 tablespoons butter, softened
- ½ cup cream cheese, softened
- 1 cup powdered sugar
- ½ cup whole milk
- ½ teaspoon vanilla extract
Red Velvet Waffles
- 2 cups Bisquick mix
- 2 tablespoons brown sugar
- 3 tablespoons unsweetened cocoa powder
- 1 cup buttermilk
- ½ cup whole milk
- 30 drops red gel food coloring
- 1 egg
- 2 tablespoons melted butter
- 1 teaspoon vanilla extract
Instructions
- Make the cream cheese glaze: Beat the softened butter and cream cheese together until soft and smooth. Add the powdered sugar and beat until the mixture is light and fluffy, scraping down the sides of the bowl to avoid lumps.
- Add liquid ingredients to glaze: Mix in the whole milk and vanilla extract, then set the cream cheese glaze aside while you prepare the waffles.
- Preheat waffle iron: Turn on your waffle iron to heat it up, so it’s ready to cook when the batter is prepared.
- Mix dry waffle ingredients: In a medium bowl, whisk together the Bisquick mix, brown sugar, and unsweetened cocoa powder until evenly combined.
- Add wet ingredients to waffle batter: Pour in the buttermilk, whole milk, red gel food coloring, egg, melted butter, and vanilla extract. Whisk the batter until it is smooth and uniform in color.
- Cook waffles: Pour about ¾ cup of the red velvet batter into the hot waffle iron. Close the lid and cook for about 5 minutes, or until the waffle easily pulls away without sticking and has a slightly crispy, lightly browned outside.
- Serve with glaze: Drizzle some cream cheese glaze over the warm red velvet waffles immediately. Repeat cooking the remaining batter and serve warm for best texture and flavor.
Notes
- Add more milk to thin the cream cheese glaze or reduce milk to ¼ cup for a thicker frosting consistency.
- If buttermilk is unavailable, mix 1 tablespoon white vinegar with 1 cup regular milk and let it curdle to mimic buttermilk’s tang and texture.
- Omit the brown sugar from the waffle recipe if you prefer less sweetness, as the cream cheese glaze already provides a rich sweet flavor.
Nutrition
- Serving Size: 1 waffle with glaze
- Calories: 350 kcal
- Sugar: 18 g
- Sodium: 450 mg
- Fat: 18 g
- Saturated Fat: 9 g
- Unsaturated Fat: 8 g
- Trans Fat: 0 g
- Carbohydrates: 40 g
- Fiber: 2 g
- Protein: 6 g
- Cholesterol: 55 mg


Leave a Reply