If you’re someone who loves a cookie with a fun twist, you’re going to adore this Strawberry Kiss Cookies Recipe. These soft sugar cookies are flecked with colorful sprinkles and topped with a sweet strawberry chocolate kiss—perfect for celebrations or just brightening up your snack time.

Jump to:
Why You'll Love This Recipe
Honestly, I can’t get enough of these Strawberry Kiss Cookies. Every time I make them, friends and family can’t wait to dig in. The cream cheese in the dough makes these cookies irresistibly soft, and pairing them with Hershey’s Strawberry Ice Cream Cone Kisses adds that perfect pop of sweetness and color.
- Soft, Chewy Texture: Thanks to the cream cheese, these cookies come out super tender and soft every time.
- Funfetti Flavor: The colorful sprinkles in the Funfetti mix make each cookie a little celebration in your mouth.
- Easy to Make: With just a few ingredients and simple steps, they’re quick to whip up for any occasion.
- Perfect Presentation: The strawberry kisses on top bring a festive, fruity touch that’s sure to impress.
Ingredients & Why They Work
I always recommend starting with quality ingredients that bring this recipe to life. The Funfetti sugar cookie mix adds that classic sprinkle-packed sweetness. The cream cheese is key for a tender, soft cookie that’s a step above ordinary sugar cookies. And those Hershey’s Strawberry Ice Cream Cone Kisses? They’re the star topping that makes these cookies so memorable.
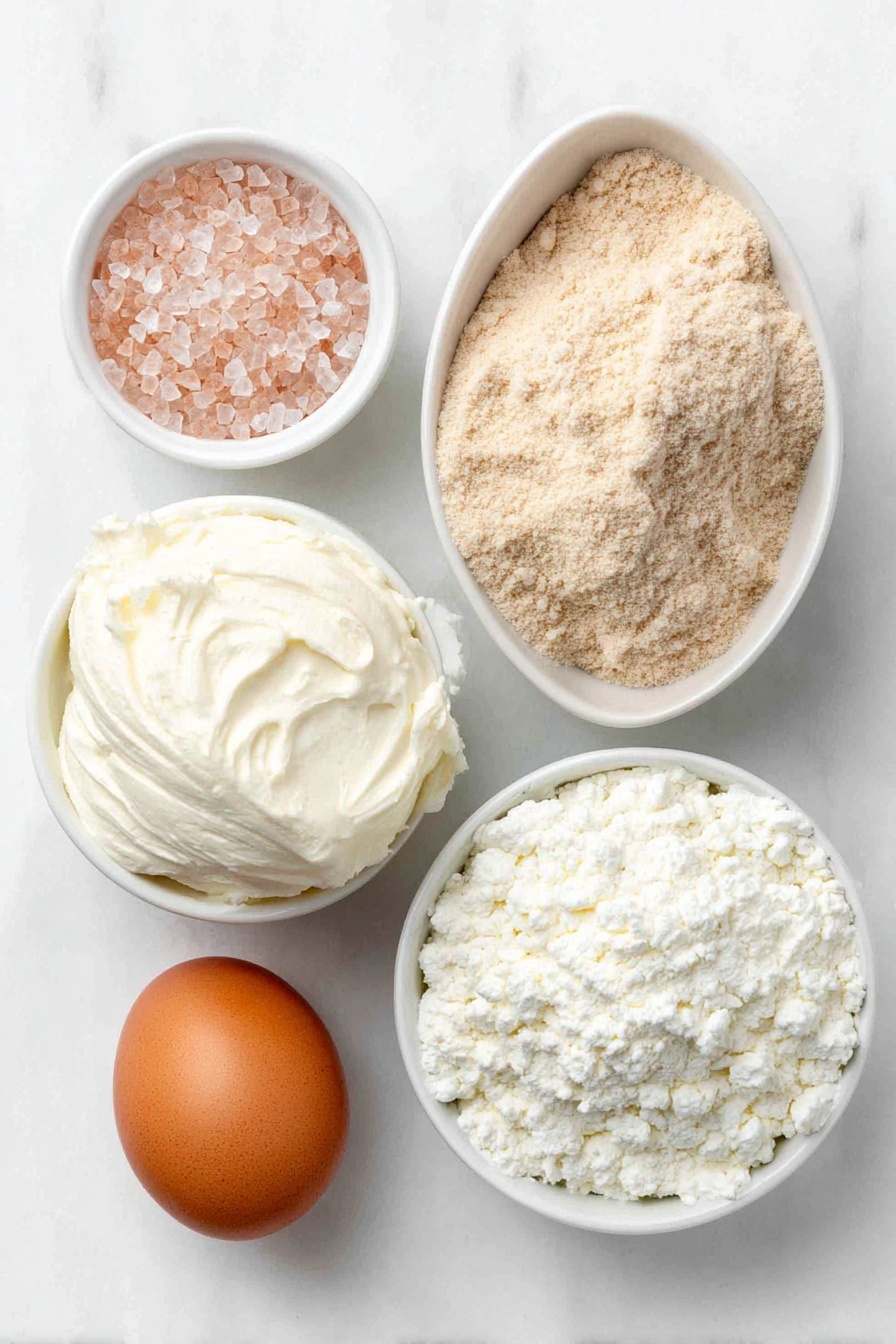
- Funfetti sugar cookie mix: The rainbow sprinkles bring color and fun, turning simple cookies into mini celebrations.
- Cream cheese: This adds moisture and richness, making the cookies irresistibly soft and creamy.
- Large egg: Helps bind the dough together for perfect consistency.
- Pink or white sanding sugar or non-pareils: Adds a sparkling coating and extra texture on the outside.
- Hershey’s Strawberry Ice Cream Cone Kisses: These unique strawberry-flavored chocolates give the cookies their signature look and fruity finish.
Make It Your Way
The Strawberry Kiss Cookies Recipe is wonderfully versatile, making it easy to add your own creative touch. Whether you want to play with colors, textures, or even dietary preferences, there’s room to make these cookies truly yours.
- Gluten-Free Variation: I once swapped the Funfetti mix with a gluten-free sugar cookie mix and was thrilled with how the cookies stayed soft and festive. Just make sure your mix is meant for sugar cookies for the best results!
- Seasonal Twist: Around Valentine’s Day, I love using red or white sanding sugar instead of pink for a seasonal splash. It really amps up the festive look and keeps the strawberry kiss theme intact.
- Dairy-Free Adaptation: For friends who avoid dairy, using a plant-based cream cheese alternative works well. The texture is slightly different but still creamy enough to bind the dough beautifully.
- Extra Funfetti: For a more colorful cookie, sprinkle a few extra rainbow non-pareils inside the dough before rolling. It’s like a party in every bite!
Step-by-Step: How I Make Strawberry Kiss Cookies Recipe
Step 1: Get Ready – Prep Your Space and Oven
Start by lining a large baking sheet with parchment paper to prevent sticking and make cleanup a breeze. Then, preheat your oven to 375 degrees Fahrenheit. Having your oven ready ensures your cookies bake evenly once you’re done preparing the dough.
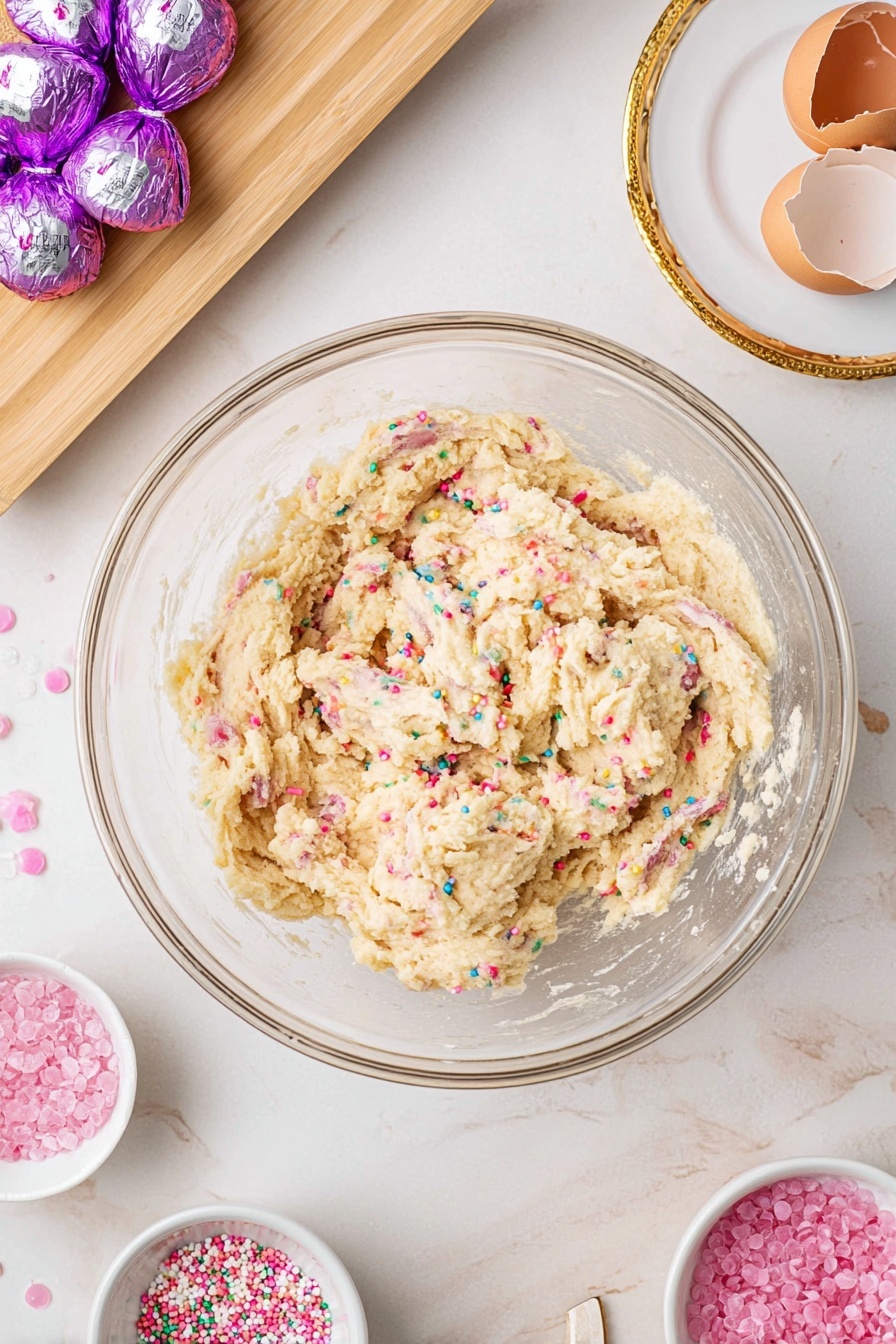
Step 2: Whip Up the Soft Dough
In a large mixing bowl, combine the entire 16-ounce bag of Funfetti sugar cookie mix, 4 ounces of softened cream cheese, and 1 large egg. Using a hand or stand mixer, beat these ingredients until they form a smooth, soft dough. It will feel a bit sticky, which is perfectly normal — that cream cheese keeps these cookies wonderfully tender!
Step 3: Coat Your Cookie Dough Balls
Pour your choice of pink or white sanding sugar or non-pareils into a shallow bowl. Using a 1 ½ tablespoon cookie scoop, scoop out portions of dough and gently drop them into the sugar or non-pareils. Roll each piece around until it’s thoroughly coated, then form into even balls. This step adds a delicate crunch and a sprinkle of sparkle to every cookie.
Step 4: Optional Chill for Easier Handling
If your dough feels too sticky to scoop and roll comfortably, pop it into the refrigerator or freezer for 30-60 minutes. Chilling firms up the dough slightly, making it easier to work with — but remember, this is entirely up to you. Either way, you're on track for delicious cookies!
Step 5: Arrange and Bake
Place your coated cookie balls onto the prepared baking sheet, spacing them about 1 ½ inches apart to allow for gentle spreading. Bake them in your preheated 375°F oven for 12 minutes. You’re looking for edges to set but the cookies themselves to stay soft—this balance is what makes these cookies so irresistible.
Step 6: Cool and Add the Strawberry Kisses
Let the cookies cool on the baking sheet for 3-5 minutes. Then, carefully press one unwrapped Hershey’s Strawberry Ice Cream Cone Kiss into the center of each cookie. This step is where the magic happens—the warmth of the cookie softens the kiss just enough to stick without losing its shape.
Step 7: Final Cooling and Serving
Transfer your cookies onto a wire rack to cool completely if you want the strawberry kisses to stay firm, or serve them while still warm for melty, luscious tops. Either way, these cheerful cookies will bring smiles and maybe even a few happy sighs.


Leave a Reply